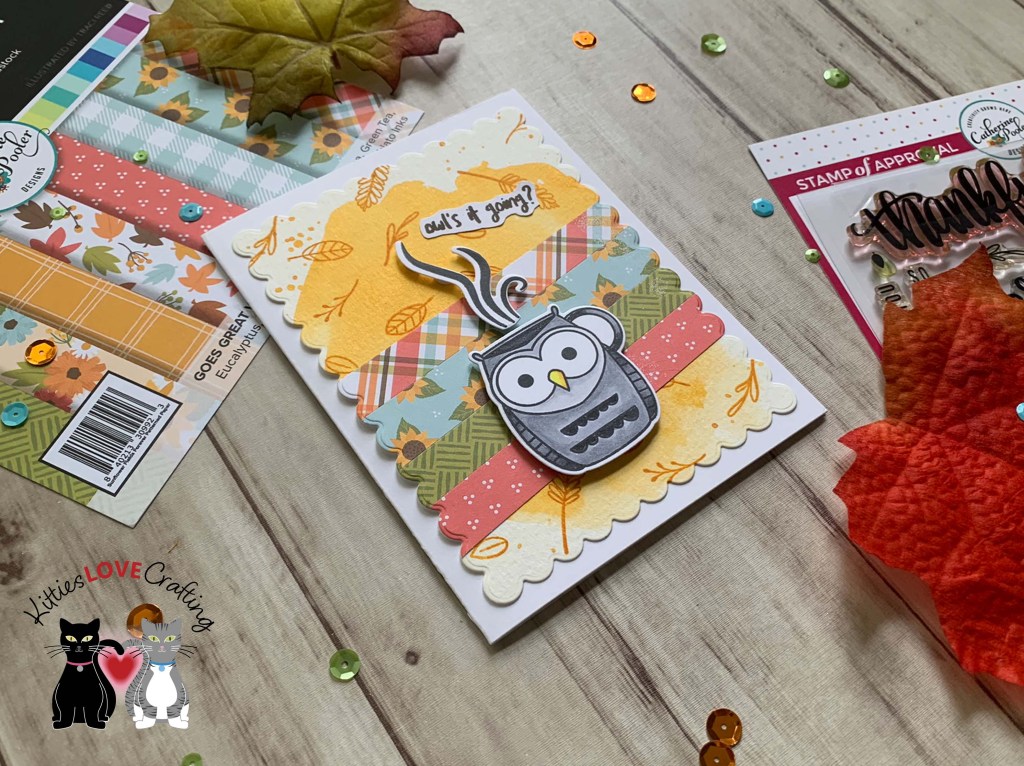
Hello friends. The Catherine Pooler Designs Halloween Mug Shot Stampset (included in the Boo Box) is adorable for Halloween but also can be used to create Fall cards. For this card I took a simple watercolor background and elevated it by adding stamped images.
I stamped the owl mug from the Catherine Pooler Designs Halloween Mug Shots Stampset (included in the Boo Box) onto some Neenah 100lb Classic Crest Cardstock 8.5 X 11″ with Memento Tuxedo Ink. I used Copic markers to color some of the image. I used C1, C3, C5, & C7 and Y17 & Y06.
On the inside of the card, I cut two pieces of CP Sunflower Fields Forever 6 x 6 Patterned Paper to 1 x 4-1/4″ and 1-1/4 x 4-1/4″ and stamped a sentiment from the Catherine Pooler Designs Autumn Blessings Stampset (discontinued) with CP Sauna and CP S’mores Inks.
Dimensions
Card Base = 5-1/2 x 8-1/2″ and scored at 4-1/4″ Neenah 100lb Classic Crest Cardstock 8.5 X 11″; 4-1/4 x 5-1/2″ Catherine Pooler Designs Eerie-sistible 6 x 6 Paper (included in the Boo Box)
Thanks for reading this post. I hope I’ve inspired you to give this card a try and make your own elevated watercolored background! Leave comments or questions below or feel free to email.
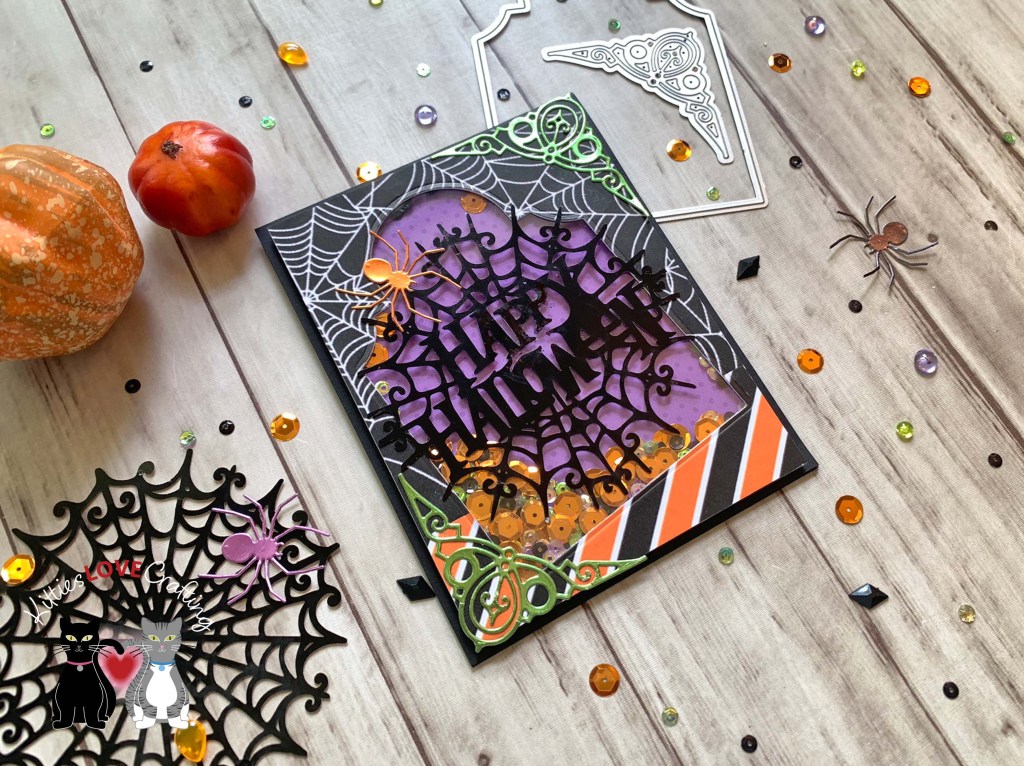
Hello friends. Here’s a quick Halloween shaker card featuring Simply Made Crafts Happy Haunting collection products. In case you are not familiar with this company, it is the creation of Helen Griffin from the UK. Go check out her blog. She has lots of cool dies and stamps.
I glued those two pieces of pattern paper together and die cut a window using the largest tombstone in the Simply Made Crafts Happy Haunting Spell Book ElementsDie Set. I backed it with a piece of acetate scut to a litlle bit smaller than 4 x 5-1/4. Then added foam tape to the back. I used a variety of green, purple, black and orange sequins from my stash. And backed it with a piece of Doodlebug Happy Haunting 12 x 12 Petite Print Paper (discontinued).
Thanks for reading this post. I hope I’ve inspired you to give this cute shaker card a try for yourself! Leave comments or questions below or feel free to email.
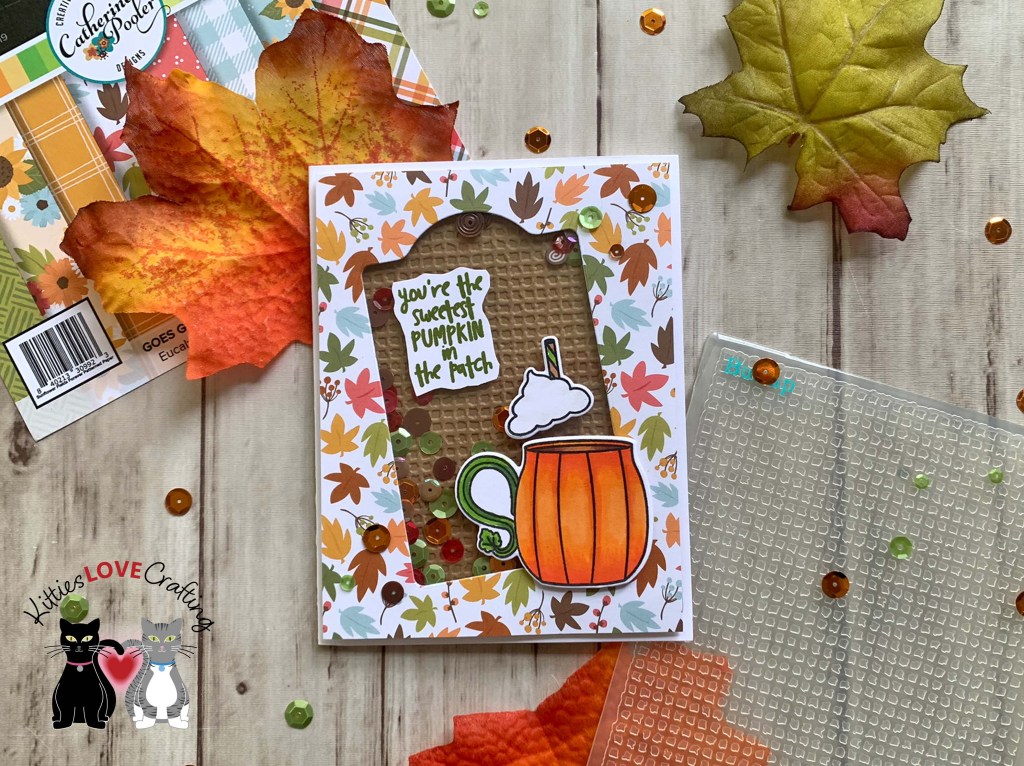
Hello friends. Here’s another Autumn inspired card featuring the cute pumpkin mug from Catherine Pooler Designs Halloween Mug Shots (incl. in the Boo Box). This time I created a shaker card using the Haunted Tags & Charms Dies (also incl. in the Boo Box).
I die cut the shaker window from the pattern paper panel using the tag in the Haunted Tags & Charms Dies (incl. in the BooBox). I added a piece of acetate with double-sided tape and added foam tape to the back. For the backer panel I cut a piece of Lawn Fawn Paper Bag 100 lb Cardstock to 4 x 5-1/4″ and used the Taylored Expressions Burlap Embossing Folder to add texture. For the shaker bits, I used some orange, red, brown and green sequins from my stash.
I stamped the pumpkin mug and foam images from the Catherine Pooler Designs Halloween Mug Shots (incl. in the Boo Box) onto some Neenah 100lb Classic Crest Cardstock 8.5 X 11″ with Memento Tuxedo Black Ink. I used Copic markers to color the images. I used YR04, YR09, YR14, , E23, E29, YG25, & YG67 for the mug; and W0 & 0, YG25, and E23 for the foam and straw.
Thanks for reading this post. I hope I’ve inspired you to create your own fall shaker card using this cute stampset! Leave comments or questions below or feel free to email.
Hello friends. So for this card, I thought I’d use a technique that I love to use to create dimensional backgrounds without having to have an embossing folder. You can use your dies to create faux embossed backgrounds. It’s super easy and fun to do!
For this card, I cut a piece of Neenah 100lb Classic Crest Cardstock 8.5 X 11″ to 5-1/2 x 8-1/2″ and scored at 4-1/4″ to create an A2 card base, and another piece to 3-3/4 x 5″, and a piece of pattern paper from the Catherine Pooler Designs Eerie-sistible 6 x 6 Paper (included in the Boo Box) to 4-1/4 x 5-1/2″.
I die cut several words from the Catherine Pooler Designs Made You Eek Die Set (included in the Boo Box) from Neenah 100lb Classic Crest Cardstock 8.5 X 11″ and adhered to the background panel to create a pattern, creating an embossed look.
On the inside of the card, I cut a piece of Catherine Pooler Designs Eerie-sistible 6 x 6 Paper (included in the Boo Box) to 1 x 5-1/4″, stamped a sentiment from the Catherine Pooler Designs Fright Night Stampset with CP Martini Ink and just added a purple witch hat.
Dimensions
Card Base = 5-1/2 x 8-1/2″ and scored at 4-1/4″ Neenah 100lb Classic Crest Cardstock 8.5 X 11″; 4-1/4 x 5-1/2″ Catherine Pooler Designs Eerie-sistible 6 x 6 Paper (included in the Boo Box)
Thanks for reading this post. I hope I’ve inspired you to give this technique a try and your own faux embossed background! Leave comments or questions below or feel free to email.
Hello friends. Today I am bringing you a card featuring Simply Made Crafts Happy Haunting collection products. This one is a quick and easy card to make.
Hello friends. Here’s a fun way to stretch your stamps to create a background — use those tiny images included in your stampsets! This card features the Catherine Pooler Designs Fright Night and Halloween Mug Shots Stampsets which came in the Boo Box released last month. I love how this card turned out!
I die cut two tags from the CP Haunted Tags & Charms die set (included in the Boo Box) from Catherine Pooler Designs Eerie-sistible 6 x 6 Paper (included in the Boo Box) and Lawn Fawn Black Licorice 8-1/2 x 11″ Cardstock and added some Doodlebug Beetle Black Doodle Twine. The bats, spider and the spiderweb are from the same tag die set. I cut the bats from both white and black cardstock and used Pixie Dust Ink to color them.
I stamped the sentiment from Catherine Pooler Designs Fright Night Stampset (included in the Boo Box) with CP Midnight Ink and fussycut it.
On the inside of the card, I cut a piece of Neenah 100lb Classic Crest Cardstock 8.5 X 11″ to 4 x 5-1/4″ as well as a piece of Catherine Pooler Designs Eerie-sistible 6 x 6 Paper (included in the Boo Box) cut to 1 x 5-1/4″. I stamped the sentiment from the Catherine Pooler Designs Boo Day Stampset (included in the Boo Box) with CP Midnight Ink and added a spiderweb die cut from white cardstock snd colored with Pixie Dust Ink.
Hello friends. Here’s a fun way to create your own pattern paper using stamps. This card features the Catherine Pooler Designs Fright Night Stampset which came in the Boo Box released last month.
For this card, I cut a piece of Neenah 100lb Classic Crest Cardstock 8.5 X 11″ to 5-1/2 x 8-1/2″ and scored at 4-1/4″ to create an A2 card base, and another piece to 3-3/4 x 5″, and a piece of vellum to 3-1/2 x 4-3/4″.
I stamped the sentiment from Catherine Pooler Designs Fright Night Stampset (included in the Boo Box) with CP Midnight Ink. And lastly die cut the two words from Simon Says Stamp 100lb Black Cardstock using the Catherine Pooler Designs Made You Eek die set (included in the Boo Box).
I left the inside of the card blank and just added an orange pumpkin from the Catherine Pooler Designs Fright Night Stampset (included in the Boo Box).
Hello friends. Here’s a cute slimline Halloween card featuring the Catherine Pooler Designs Halloween Mug Shots Stampset which came in the Boo Box released last month. This stampset is so stinking cute! I’m in love.
For this card, I cut a piece of Neenah 100lb Classic Crest Cardstock 8.5 X 11″ to 7 x 8-1/2″ and scored at 3-1/2″ to create a slimline card base, a piece of pattern paper from Catherine Pooler Designs Eerie-sistible 6 x 6 Paper (included in the Boo Box) cut to 3-1/2 x 8-1/2″, and another piece of Neenah 100lb Classic Crest Cardstock 8.5 X 11″ to 3 x 8″. I also cut another piece of pattern paper to 1 x 8″ for the front panel.
I stamped the images from the Catherine Pooler Designs Fright Night and Halloween Mug Shots Stampsets (included in the Boo Box) onto Neenah 100lb Classic Crest Cardstock 8.5 X 11″ with Memento Tuxedo Black Ink. I used Copic Markers to color the images. I used C0, 0, Y06, Y17, YR04, & YR09 for the candy corn; C5, C7, YG25, Y06, V04 & V09 for the witch mug; YG17, YG25, YR04, YR09, E33, E25; C0, 0R20, YG17 & YG01 for the ghosts and ghost mug; V04, V06, V09, R20, YG25, YG17, Y17 & YR04 for the bat mug; V04, V06, V09, YG17, YG01 & YG25 for the bubbles; C0, 0, YG25, V22, V25, E25, E33 for the foam with broom; and C0, 0 & YG25 for the foam with straw.
I added some stars die cut from white card stock using the CP Haunted Tags & Charms Die Set (included in the Boo Box) which I colored with Melon Ice Ink.
I stamped the sentiment from Catherine Pooler Designs Halloween Mug Shots Stampset (included in the Boo Box) with CP Midnight Ink and fussycut it. I popped up some of the images and the sentiment using some 3M Foam Tape.
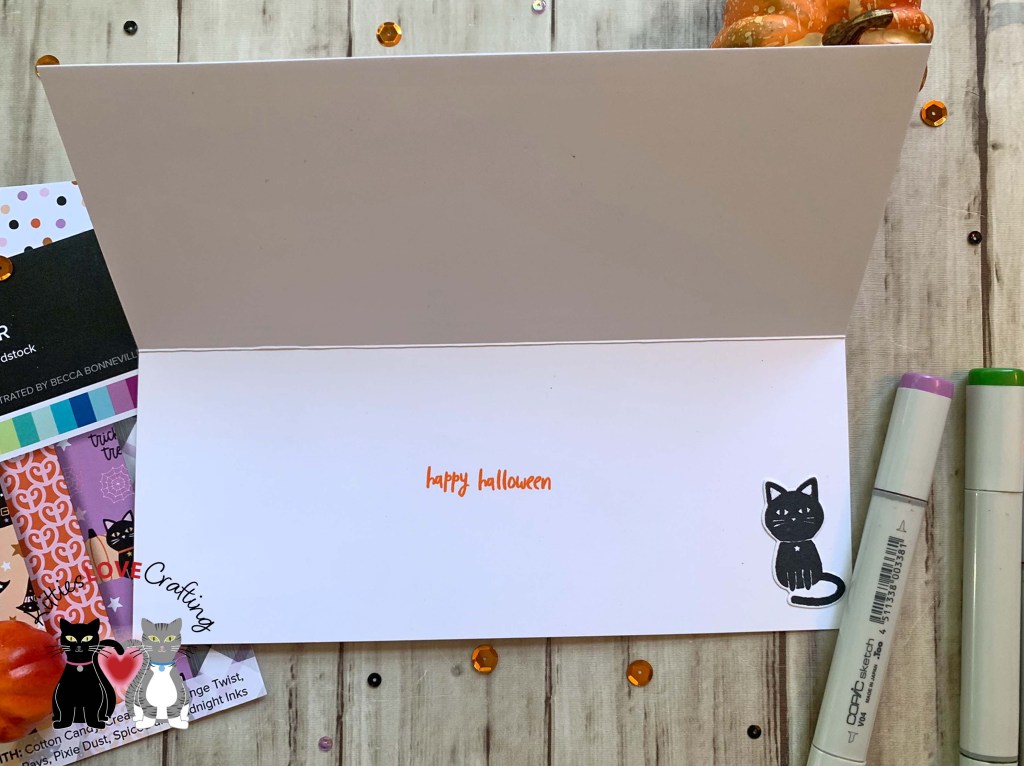
On the inside of the card, I stamped from the CP Boo Day Stampset (included in the Boo Box) with Orange Twist Ink and added a black cat from the Fright Night Stampset.
Background Panel = 3-1/2 x 8-1/2″ Catherine Pooler Designs Eerie-sistible 6 x 6 Paper (included in the Boo Box); 3 x 8″ Neenah 100lb Classic Crest Cardstock 8.5 X 11″; 1 x 8″ Catherine Pooler Designs Eerie-sistible 6 x 6 Paper
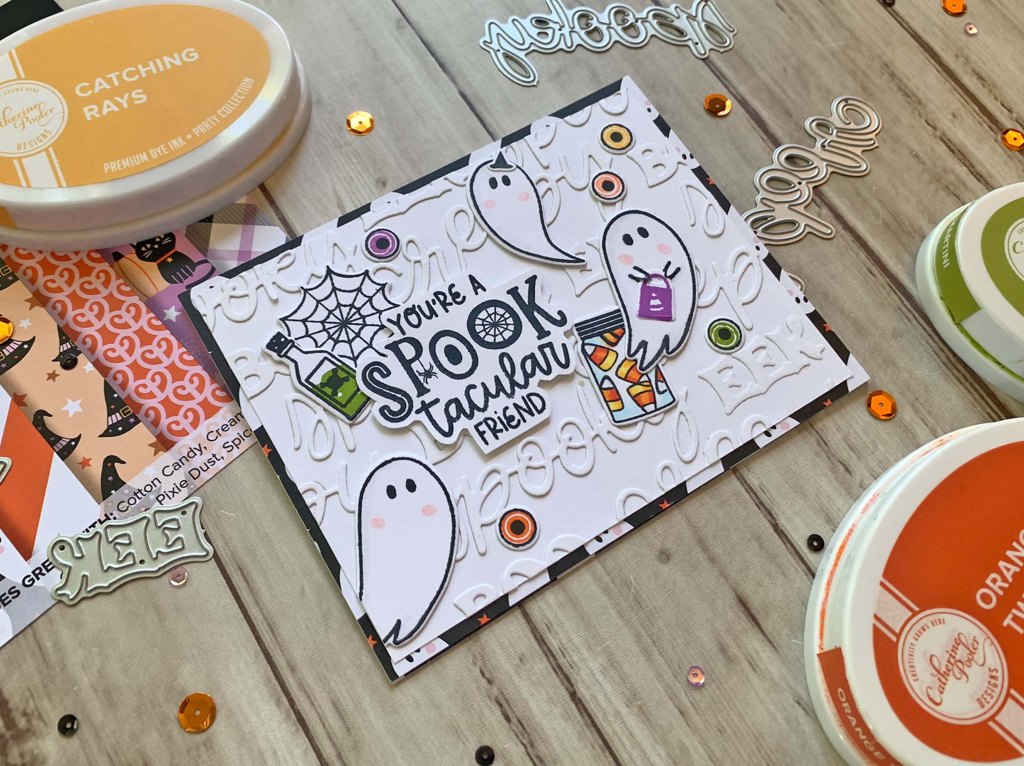
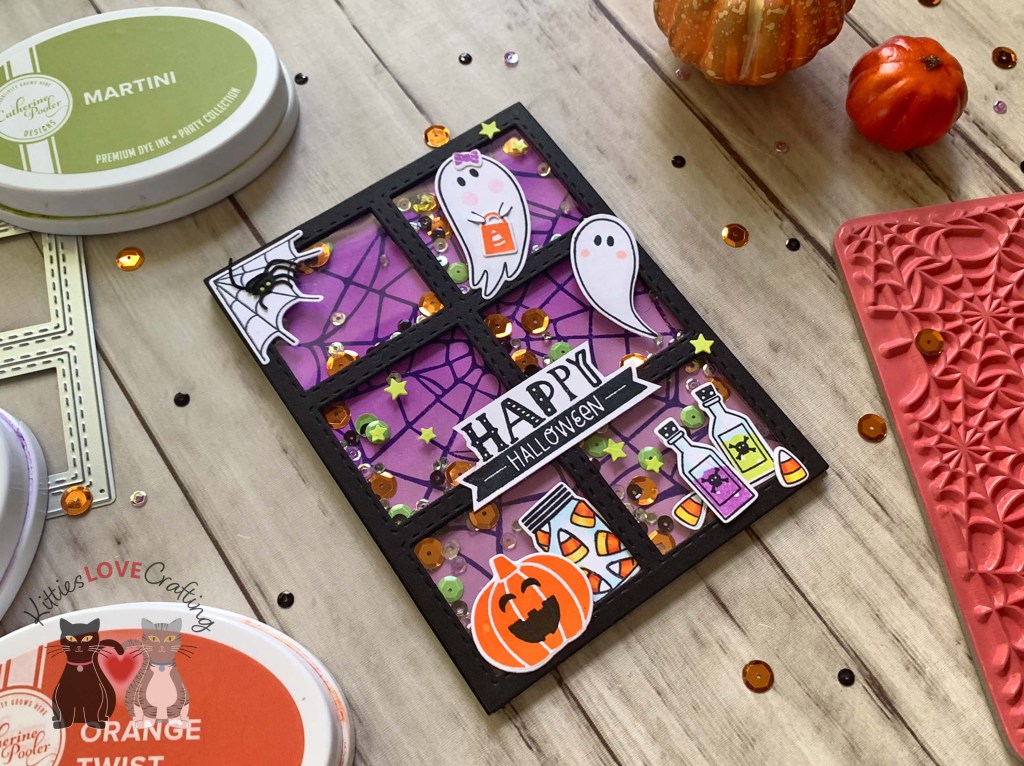
Hello friends. Here’s a cute Halloween shaker card using the Count to Six Coverplate included in the Catherine Pooler Boo Box. If you purchased this box then you know how absolutely adorable it is! If not, you can still make this style of card using stamps and dies you own.
For this card, I cut a piece of Simon Says Stamp 100lb Black Cardstock to 4-1/4 x 11″ and scored at 5-1/2″ to create a top folding A2 card base. I die cut 3 window frames from the same black cardstock using the Catherine Pooler Designs Count to Six Cover Plate (included in the Boo Box). I cut a piece of acetate to 4-1/4 x 5-1/2 and placed it behind the frames. Then added foam tape strips to the back.
I stamped the images from Catherine Pooler Designs Fright Night Stampset (included in the Boo Box) using CP Midnight, Cotton Candy, Orange Twist, Melon Ice, and Pixie Dust Inks. I used Copic Markers to give the ghosts some dimension as well as the jar, candy corn and poison bottles. I used C0, R20 & 0 for the ghosts; BG000 & 0 for the bottles and jar; and C0 & 0, Y06 & Y17, and YR04 & YR09 for the candy corn.
The little spider came was die cut from black cardstock using the CP Haunted Tags & Charms die set (included in the Boo Box).
On the inside of the card, I cut a piece of Neenah 100lb Classic Crest Cardstock 8.5 X 11″ to 4 x 5-1/4″. I stamped the sentiment from the Catherine Pooler Designs Fright Night Stampset (included in the Boo Box) with CP Martini Ink and added a black witch hat.
Thanks for reading this post. I hope I’ve inspired you to give this fun interactive Halloween card a try for yourself. Leave comments or questions below or feel free to email.
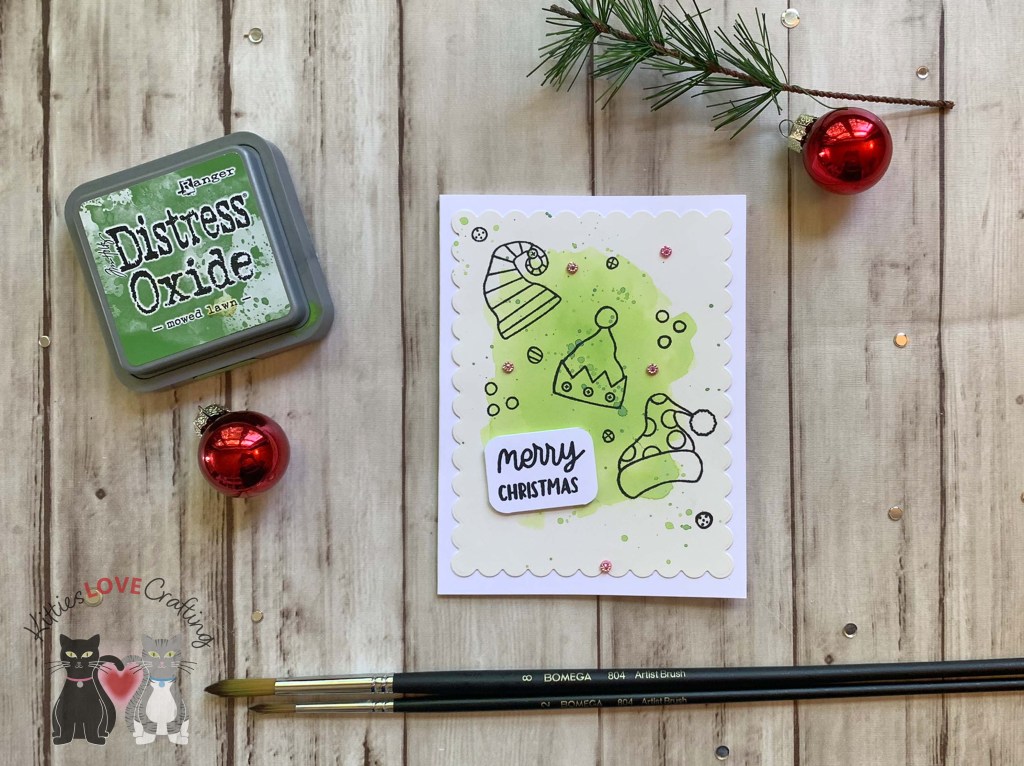
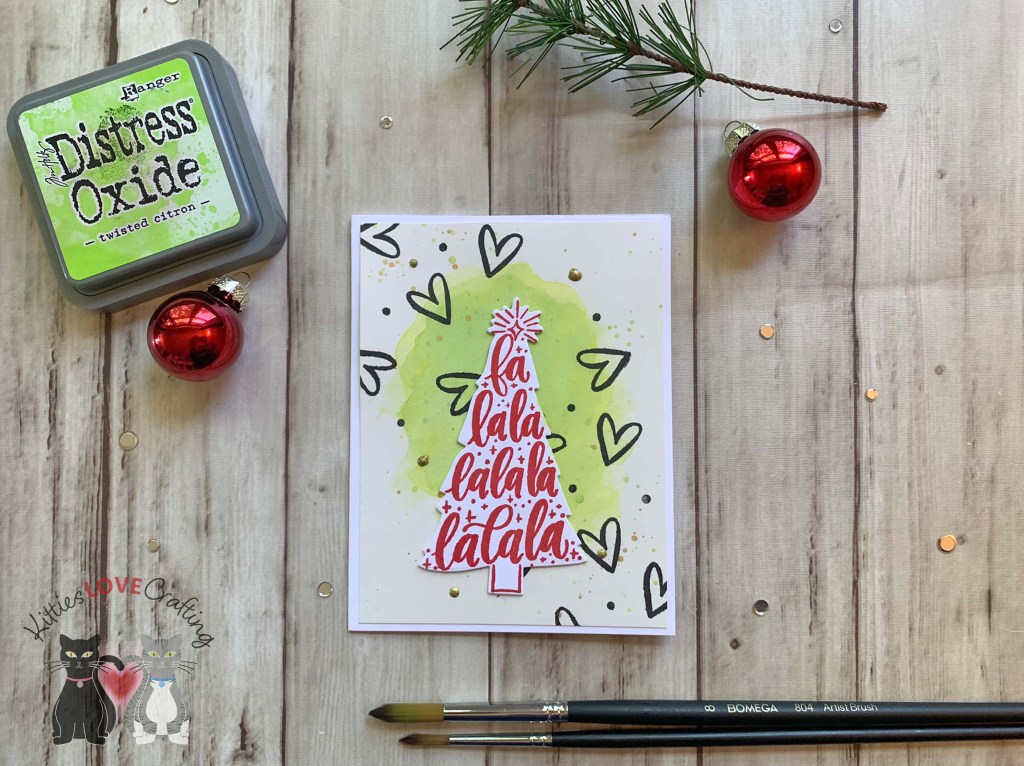
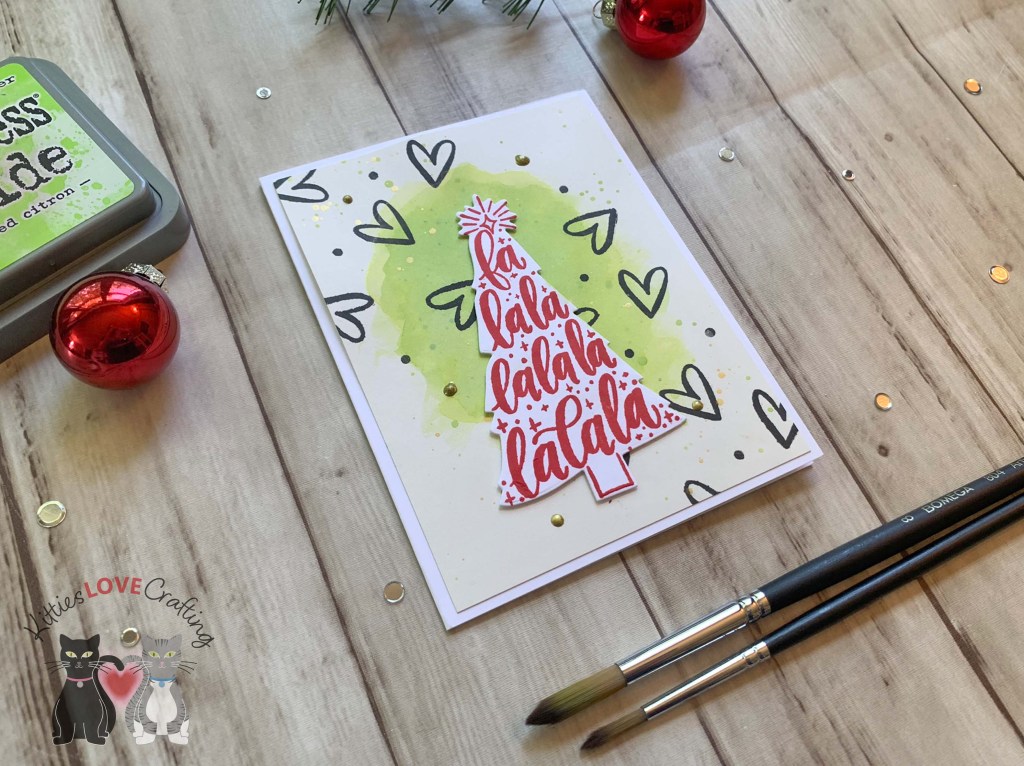
Hello friends. It’s time to create some Christmas cards! It’s never too early to start. I decided to try making some very easy watercolored cards using older products I already have. These cards can easily be mass-produced which was my objective. I used all watercolor backgrounds but stepped up a few with embossing folders. It takes very little effort but produces great results!!!
I stamped the sentiment from the same stamp set with the silver embossing powder as well. I finished the card by adding some flat silver sequins from my stash.
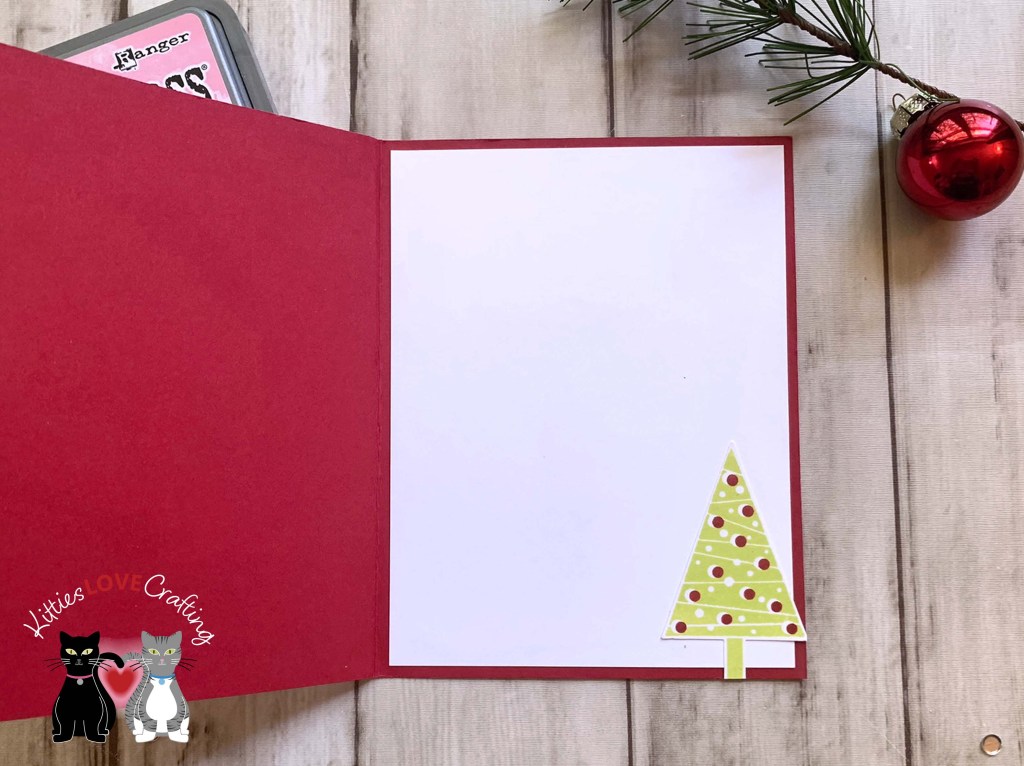
For the fourth card, I cut a piece of Stampin’ Up! Real Red 8-1/2″ X 11″ Cardstock to 5-1/2 x 8-1/2″ and scored at 4-1/4″ to create a card base. I ran the watercolored panel through my die cut machine using the Darice Wired Fence Embossing Folder (unavailable).
For the last card, I cut a piece of Neenah 100lb Classic Crest Cardstock 8.5 X 11″ to 4-1/2 x 11″ and scored at 5-1/2″ to create a card base. I ran the watercolored panel through my die cut machine using the Embossalicious Christmas Merriment Embossing Folder (unavailable).
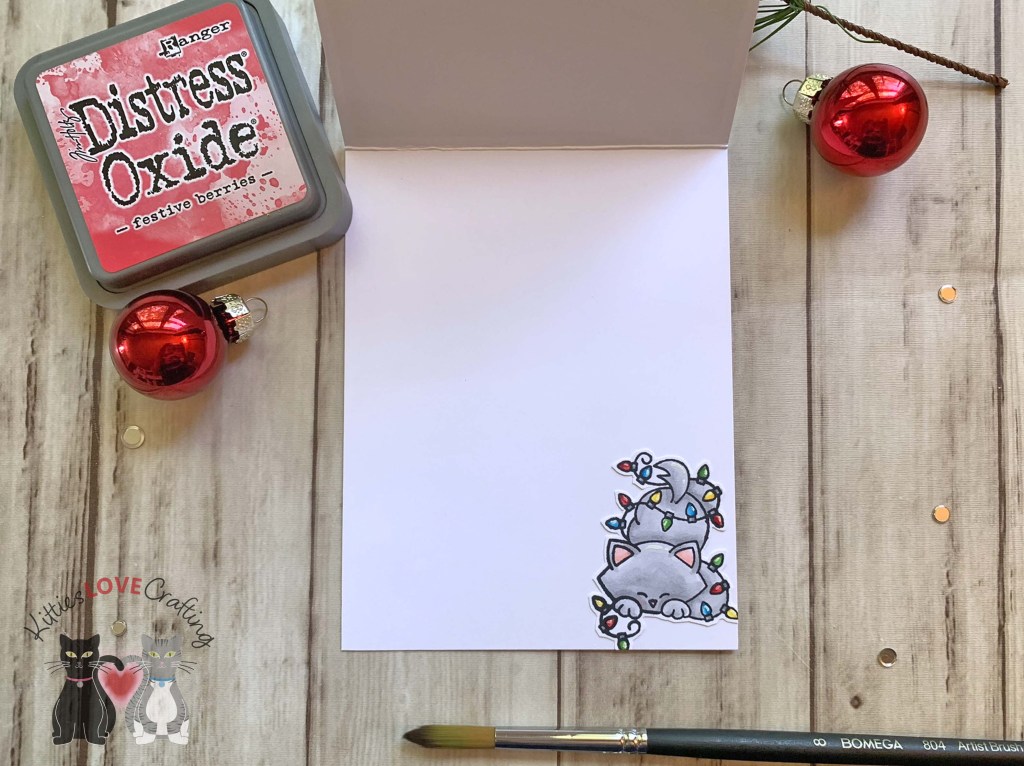
I stamped the kitty from Newton’s Nook Curoius Christmas (retired) onto Neenah 100lb Classic Crest Cardstock 8.5 X 11″ with Memento Tuxedo Black Ink. I used Copic Markers to color the images. I used R20, N0, N2, YG06 & YG17 for the cat; C1 & 0, R14, R27 and R29 for the hat; C1, B0000 and 0 for the milk and cup; E34 and E37 for the cookie; and C3, C5, YG06, YG17, R14, R29, B16, B12, Y02 and Y18. I fussycut the image and popped it up with some Stampin’ Dimensionals.
Thanks for reading this post. I hope I’ve inspired you to give this easy watercolor holiday cards a try for yourself. Leave comments or questions below or feel free to email.