Birthdays, Cards, Embossed Background, Watercolor techniques

Birthday Cards: Watercoloring an Embossed Image featuring Crafters Companion

Hello friends. In an effort to spend less this year, I’m trying to shop my stash and use some less loved items. This embossing folder (Crafter’s Companion – Embossalicious – Birthday Cupcake) has been in my stash for a very long time and I cannot remember when las I used it so it’s time. I used watercolor paper so I can color the image with watercolors. It gives it a fun organic look.

For this card, I cut a piece of Bazzill Lime Crush 12 x 12 Cardstock to 6 x 12″ and scored at 6″ to create a square card base and piece of Cold Press 140 lb Watercolor Paper to 6 x 6″. I embossed the panel using the Crafter’s Companion – Embossalicious 6 x 6″ Birthday Cupcake Embossing Folder.

Then I colored the image with watercolors. Once everything was dry I re-embossed the image because when you add water to an embossed image it can lose some of the details.

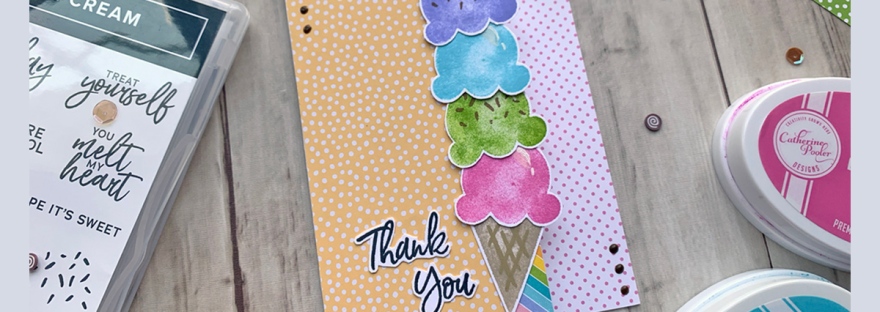
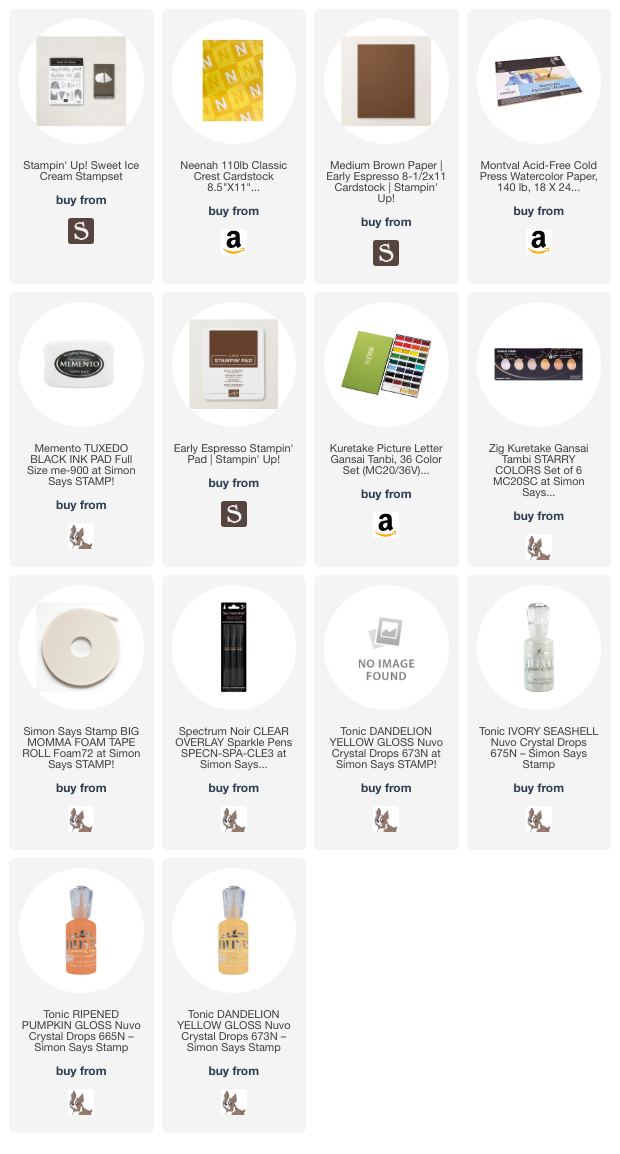
I die cut the sentiment word ‘Celebrate’ from Neenah 100lb Classic Crest Cardstock 8.5 X 11″ and Stampin’ Up! Early Espresso 80lb Cardstock using the Catherine Pooler Celebrate Die (no longer available I believe). Then stamped a sentiment from Stampin’ Up! Sweet Ice Cream Stampset (retired) onto Neenah 100lb Classic Crest Cardstock 8.5 X 11″ with Stampin’ Up! Early Espresso Ink.

I finished off the card by adding some sparkle to the ‘Celebrate’ by using a Spectrum Noir Clear Overlay Sparkle Pens, as well as some Tonic Ivory Seashell Nuvo Crystal Drops, Ripened Pumpkin Gloss Nuvo Crystal Drops, and Tonic Dandelion Yellow Gloss Nuvo Crystal Drops.

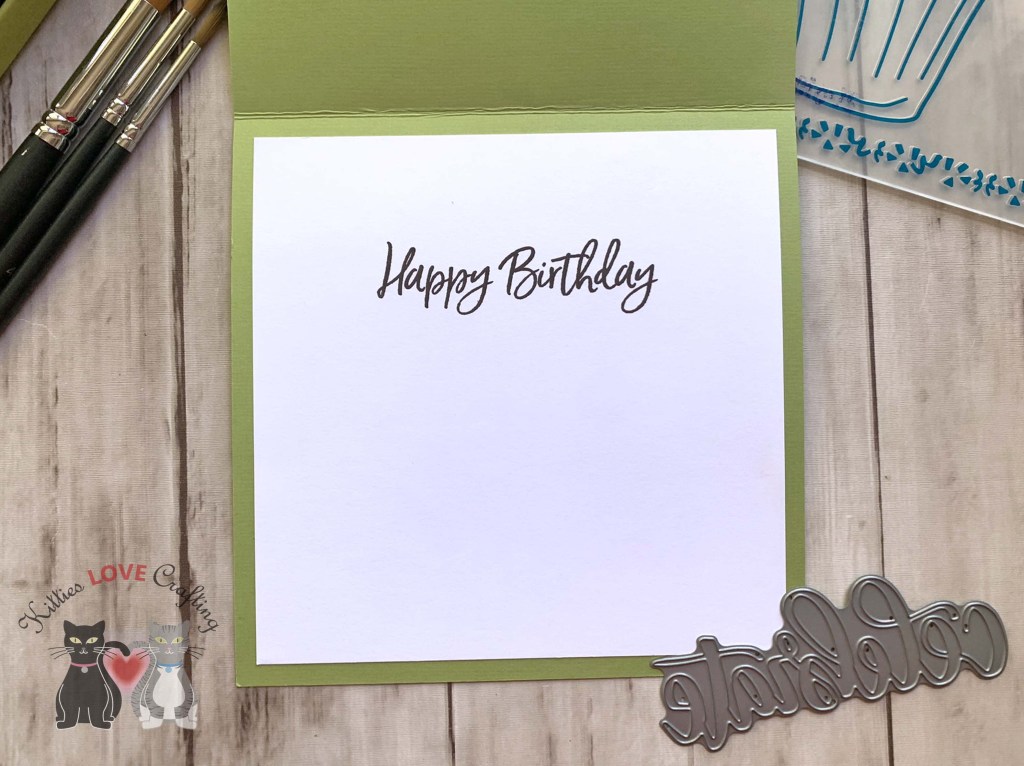
On the inside of the card, I cut a piece of Neenah 100lb Classic Crest Cardstock 8.5 X 11″ to 5-1/2 x 5-1/2″ and stamped another sentiment from Stampin’ Up! Sweet Ice Cream Stampset (retired) with Stampin’ Up! Early Espresso Ink.

Dimensions


Supplies

https://linkdeli.com/widget.js?id=f5e8378456858c916708

Thanks for reading this post. I hope Iโ€™ve inspired you to try watercoloring an embossed image. Leave comments or questions below or feel free to email.

Stampin' Up!, Summer, Thank Yous

Fun Fold Sweet Ice Cream Thank You Card and Using Your Older 6 x 6 Paper Pads

Hi everyone! I was playing with the Stampin’ Up!’s Sweet Ice Cream Stampset and tried to think of a card I can make using minimal supplies and taking advantage of all the paper in my stash! Here’s what I came up with.

I used Neenah 110lb Classic Crest Cardstock 8.5 X 11″ cut to 5-1/2 x 8-1/2″ and scored at 4-1/4″ to make the card base and cut off 1-1/2″ from the front right side of the card base. I also cut a piece of Stampin’ Up! 6 x 6 Subtles (retired) polka dot paper in So Saffron to 3 x 5-1/2″ and a piece of Lawn Fawn Really Rainbow 6 x 6 Petite Paper Pack to 1/2 x 5-1/2″ which I adhered to the front of the card and a piece of pink polka dot paper from the Doodlebug Designs 12 x 12 Milk and Cookies Petite Print Assortment (not sure if it’s available anymore) for the inside, which I cut to 1-3/8 x 5-1/2″.

I stamped the ice cream cone from Stampin’ Up!’s Sweet Ice Cream Stampset onto Neenah 110lb Classic Crest Cardstock 8.5 X 11″ with Stampin’ Up! Sahara Sand Ink (cone) and Stampin’ Up! Crumb Cake Ink (waffle pattern), and four ice cream scoops with Catherine Pooler Designs Be Mine, Lime Rickey, It’s a Boy and Serenade Inks. I also stamped the highlight that comes in the stampset with Lawn Fawn Yeti Ink on the pink and blue scoops and sprinkles on the green and purple scoops with Catherine Pooler Designs Over Coffee Ink and adhered the ice cream pieces to the card.

I stamped and fussycut the sentiment from the Stampin’ Up!’s Sweet Ice Cream Stampset onto Neenah 110lb Classic Crest Cardstock 8.5 X 11″ with Memento Tuxedo Black Ink. I finished it off by adding some Nuvo Crystal Drops in Dark Walnut.

On the inside, I stamped a sentiment from Stampin’ Up!’s Sweet Ice Cream Stampset with Memento Tuxedo Black Ink and the ice cream cone with Stampin’ Up! Sahara Sand Ink and the scoop with Catherine Pooler Designs Be Mine Ink.

Dimensions


Supplies

https://linkdeli.com/widget.js?id=f5e8378456858c916708

Thanks for reading this post. I hope you enjoyed and Iโ€™ve inspired you to try this cute summer fun fold card using this stampset and paper from your stash! Leave comments or questions below or feel free to email me. If you want to share you creations with me tag me on instagram @kittieslovecrafting.

Birthdays, Celebrations, Slimline, Stampin' Up!, Summer

A Sweet Summer Slimline Birthday Card featuring Stampinโ€™ Up!’s Sweet Ice Cream

Hi friends! Love the look of watercolor but not so great at it like me?!? This Sweet Ice Cream Stampset from Stampinโ€™ Up! is a great option. You can make quick cards with little effort but they look like you spent lots of time watercoloring the images. ๐Ÿ™‚ And they look so cute when complete!

I started by cutting a piece of Neenah 110lb Classic Crest Cardstock 8.5 X 11″ to 7 x 8-1/2″ and scored a at 3-1/2″ to create the card base and another piece to 3-1/4 x 8-1/4″. I used Stampin’ Up! Pool Party Ink and the sprinkle dots from the Sweet Ice Cream Stampset to create the background.

I stamped 3 popsicles and 2 ice cream cones onto Neenah 110lb Classic Crest Cardstock 8.5 X 11″ with Sahara Sand and Soft Suede (cone, popsicle sticks and one ice cream scoop and sprinkles) Inks, Mango Melody, Gorgeous Grape and Melon Mambo (popsicles). I used second generation stamping to get the different shades on the popsicles as well as for the pink ice cream scoop.

I stamped a sentiment from the Sweet Ice Cream Stampset onto a piece of Neenah 110lb Classic Crest Cardstock 8.5 X 11″ with Gorgeous Grape and fussycut it. I also stamped the rest of my sentiment directly on the card with Memento Tuxedo Black Ink. After adhereing all the images and esntiment to teh card I finished it off ny adding some Doodlebug Sprinkles Self Adhesive Enamel Dots in Bumblebee, Lilac, Swimming Pool, and Cupcake.

On the inside, I stamped the sprinkle dots from the Sweet Ice Cream Stampset with Stampin’ Up! Pool Party Ink.

Dimensions


Supplies

https://linkdeli.com/widget.js?id=f5e8378456858c916708

Thanks for reading this post. I hope you enjoyed and Iโ€™ve inspired you to try this cute summer slimline ice cream card using this stampset for yourself! Leave comments or questions below or feel free to email me. If you want to share you creations with me tag me on instagram @kittieslovecrafting.