Cards, Love & Friendship, Valentine's Day

A Valentine’s Day Card Using Only Dies featuring Lawn Fawn and Trinity Stamps

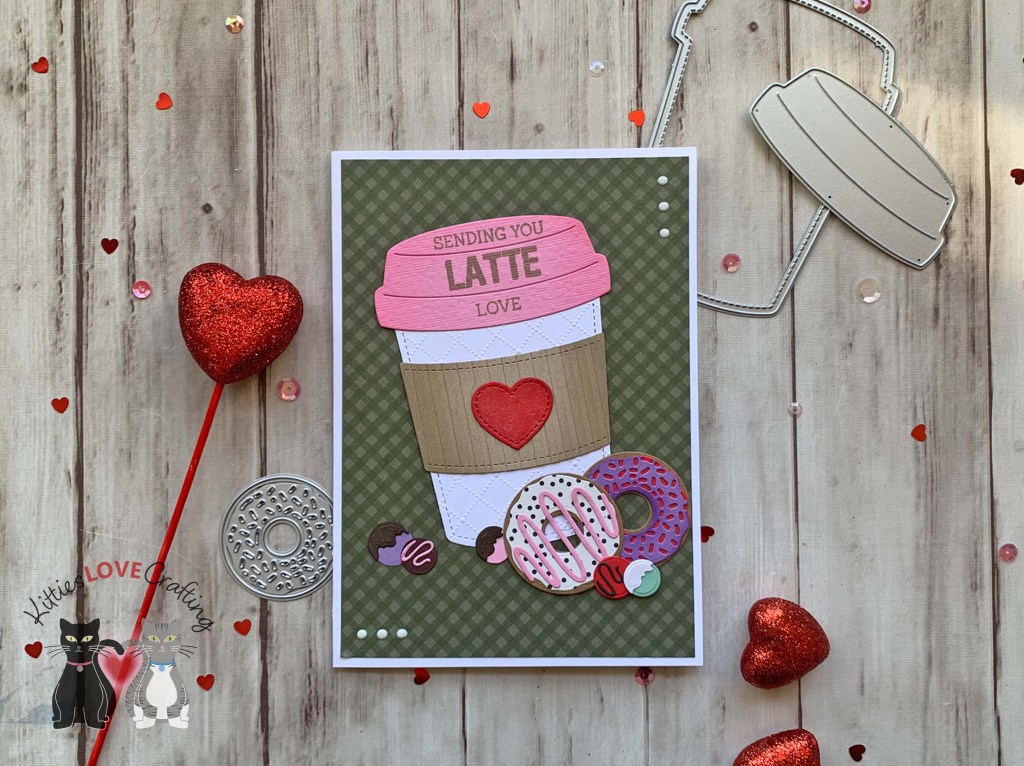
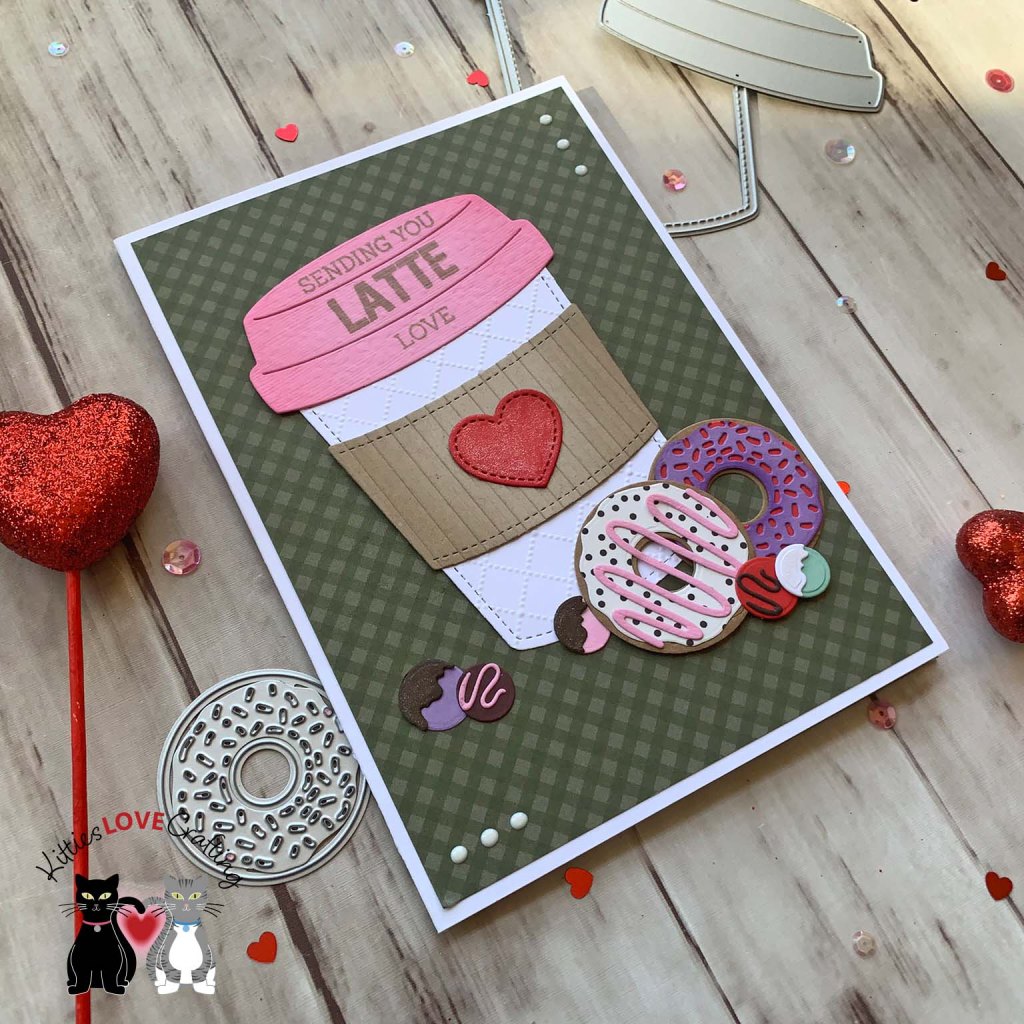
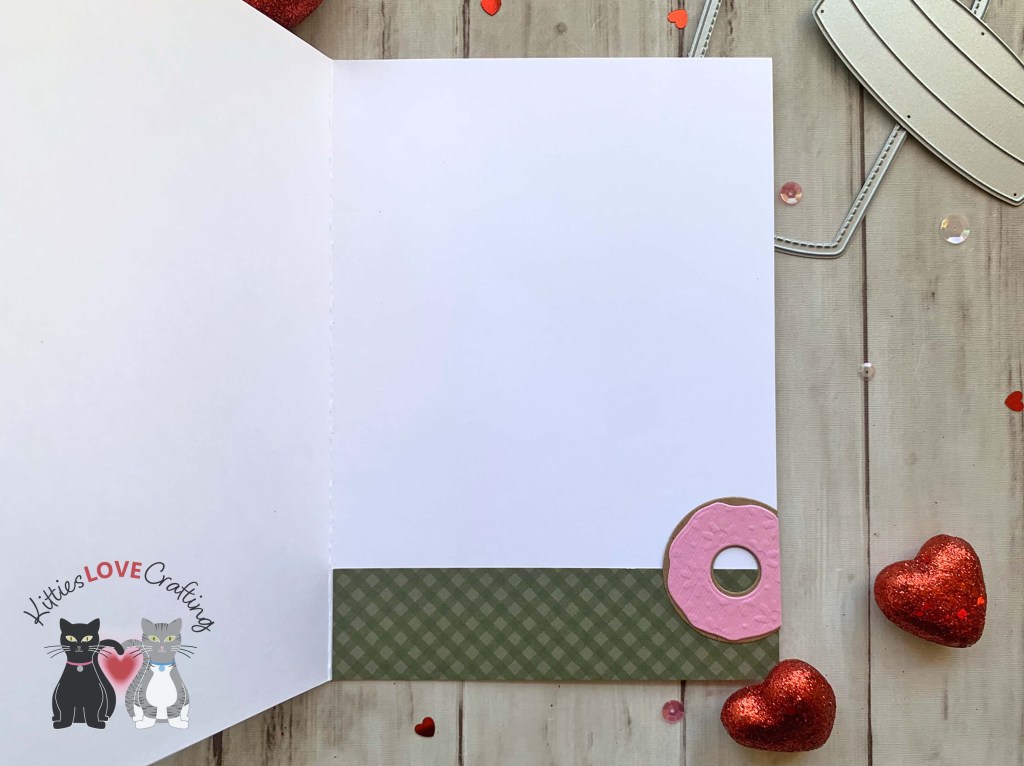
Hello friends. Here’s a cute coffee-themed Valentine’s Day card created using only dies and very minimal stamping. Great for the coffee lover in your life! Let me show you how I made this card.

For this card, I cut a piece of Neenah 100lb Classic Crest Cardstock 8.5 X 11″ to 7 x 10 and scored at 5″ to create an A7 card base. I cut a piece of Honey Bee Stamps Giddy For Gingham Paper Pad 6 x 8.5” to 4-3/4 x 6-3/4″.

I die cut the coffee cup from the Lawn Fawn Coffee Cup Gift Card Holder out of Neenah 100lb Classic Crest Cardstock 8.5 X 11″ and then embossed it using the Darice Wire Fence Embossing Folder, and the lid out of Strawberry Cheesecake Flowers Two Scoops Bazzill Cardstock. I die cut the sleeve from Lawn Fawn 8.5 x 11 Kraft Cardstock and then used one of vertical striped Embossing Folders from Queen and Company to add texture. And the heart was die cut from some Stampin’ Up! Poppy Parade 8-1/2″ X 11″ Cardstock.

For the donuts, I used Trinity Stamps Tiny Donut Dipper Die Set with Lawn Fawn 8.5 x 11 Kraft Cardstock, Simon Says Stamp 100lb Cotton Candy Cardstock, Early Espresso 8-1/2″ X 11″ Cardstock, Stampin’ Up! Mint Macaron 8-1/2″ X 11″ Cardstock (retired), Neenah 100lb Classic Crest Cardstock 8.5 X 11″, Stampin’ Up! Poppy Parade 8-1/2″ X 11″ Cardstock, and Stampin’ Up! Highland Heather 8-1/2″ X 11″ Cardstock.

I stamped the sentiment directly onto the coffee cup lid. I used Stampin’ Up! Crumb Cake Ink along with Honey Bee LATTE and Sugar Pea Designs Espresso Yourself (retired) Stamp Sets.

I finished off the card by adding some sparkle to the heart with a Spectrum Noir Clear Overlay Sparkle Pen and Tonic Gloss Simply White Nuvo Crystal Drops.

On the inside of the card, added a strip of the same pattern paper as the front panel cut to 1 x 5″, and another donut.

Dimensions


Supplies

https://linkdeli.com/widget.js?id=f5e8378456858c916708

Thanks for reading this post. I hope Iโ€™ve inspired you to give this cute coffee-themed Valentine’s Day card a try for yourself. Leave comments or questions below or feel free to email.

Cards, Christmas

Holiday Snowglobe Scene Card feat. Lawn Fawn Frosty Family

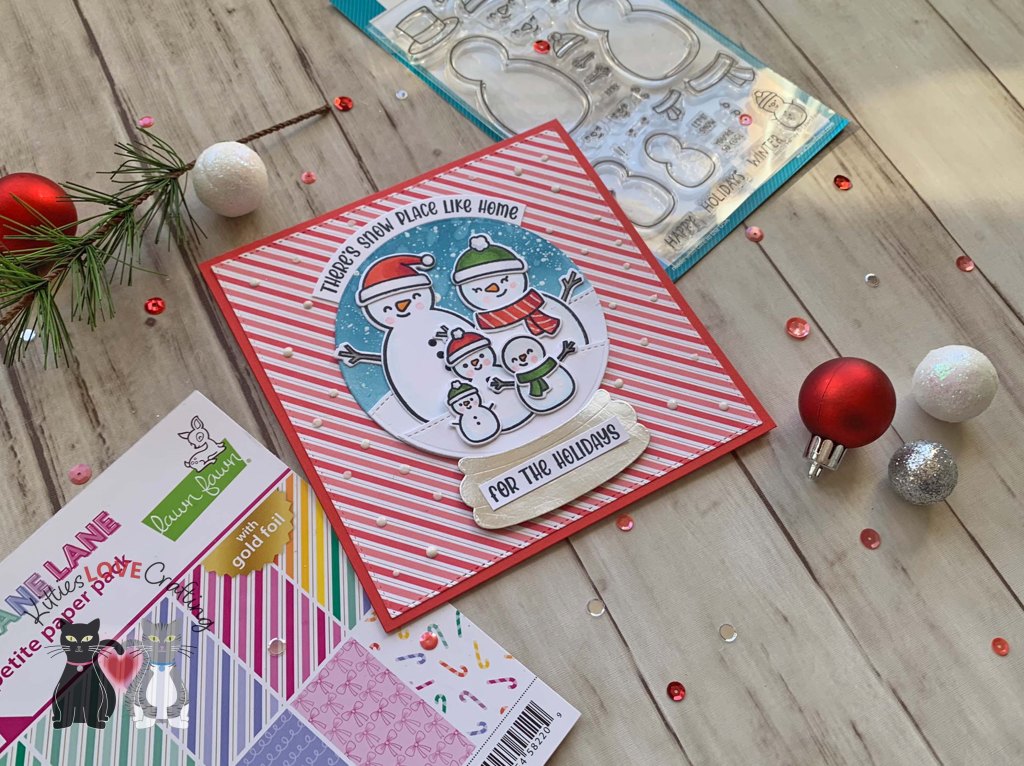
Hello friends. This cute little snowman family from Lawn Fawn Frosty Family Stamps was just so much fun to color and use on a card. I used the Catherine Pooler Snowglobe Dies (discontinued) to create this cute snowglobe scene.

For this card, I cut a piece of Stampin’ Up! Poppy Parade 8-1/2″ X 11″ Cardstock to 11 x 5-1/2″ and scored at 5-1/2″ as well as a piece of Lawn Fawn Candy Cane Lane 6 x 6″Inch Paper Pack to 5-1/4 x 5-1/4″ using Queen & Company’s Foundation 16 Dies.

I die cut the snowglobe background from Neenah 100lb Classic Crest Cardstock 8.5 X 11″ using the Catherine Pooler Snowglobe Dies (discontinued). Then used Tim Holtz Tumbled Glass and Uncharted Mariner Distress Oxide Inks to ink blend the sky. I sprayed some water on it as well as some splatter with Plaid-Craft Martha Stewart Pearl Acrylic Craft Paint. I die cut the snowy hills from Neenah 100lb Classic Crest Cardstock 8.5 X 11″ using Lawn Fawn Stitched Hillside Borders Dies and the snowglobe base from Tim Holtz Idea-Ology Metallic Gold & Silver Kraft Cardstock.

I stamped the snowmen and accessories from the Lawn Fawn Frosty Family Stamps onto Neenah 100lb Classic Crest Cardstock 8.5 X 11″ with Memento Tuxedo Black Ink. I colored the image with Copic markers. I used BG000 & 0, R20, YR14 & YR04, and 100 for the snowmen; R17 & R46 and YG17 & YG67 for the scarves; W5 & W7 for the twig hands; and C1 & 0, R17 & R46 and YG17 & YG67 for the hats.

For the sentiment, I stamped it from the Lawn Fawn Henry’s Build-A-Sentiment – Winter onto Neenah 100lb Classic Crest Cardstock 8.5 X 11″ with Memento Tuxedo Black Ink. I curved the top portion of the sentiment.

I finished the card by adding some shimmer with a Spectrum Noir Clear Overlay Sparkle Pen and some Nuvo White Gloss Drops.

On the inside of the card, I cut a piece of Neenah 100lb Classic Crest Cardstock 8.5 X 11″ to 5-1/4 x 5-1/4″ using Queen & Company’s Foundation 16 Dies and a strip of Lawn Fawn Candy Cane Lane 6 x 6″ Inch Paper Pack to 1 x 5-1/4″. I stamped another sentiment from Lawn Fawn Henry’s Build-A-Sentiment – Winter with Stampin’ Up! Poppy Parade Ink.

Dimensions


Supplies

https://linkdeli.com/widget.js?id=f5e8378456858c916708

Thanks for reading this post. I hope Iโ€™ve inspired you to make this cute snowmen family card! Leave comments or questions below or feel free to email.

Inlay diecutting technique, Tags, Techniques

Holiday Tags and Ornaments featuring the Catherine Pooler Designs Candy Cane Christmas

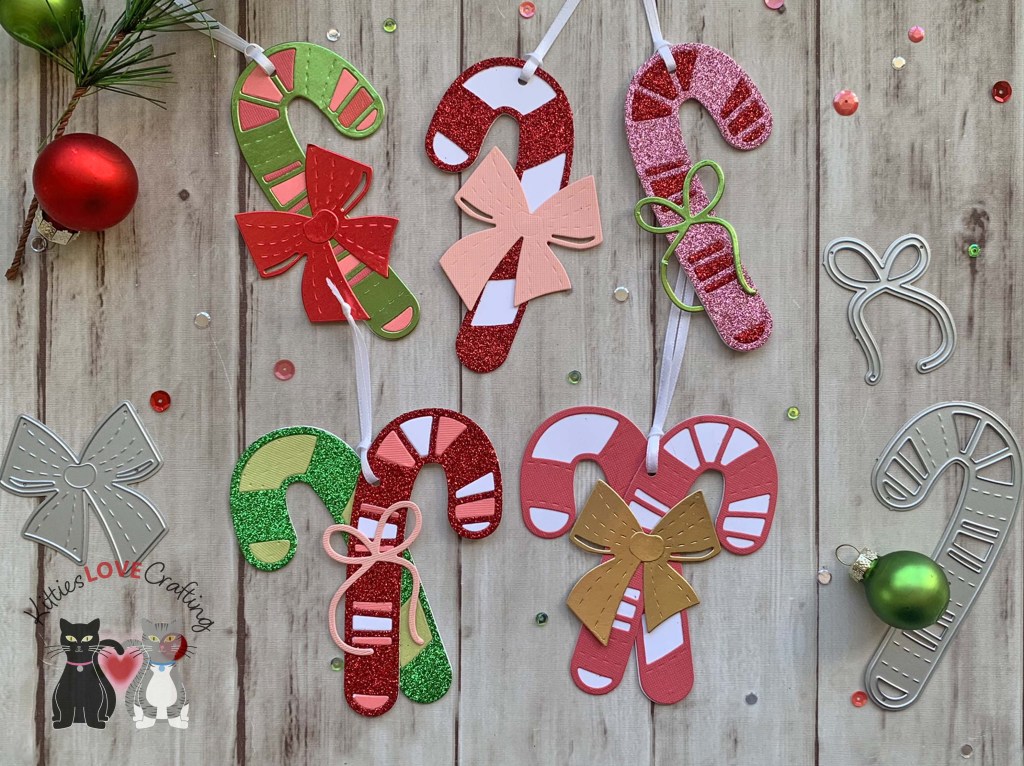
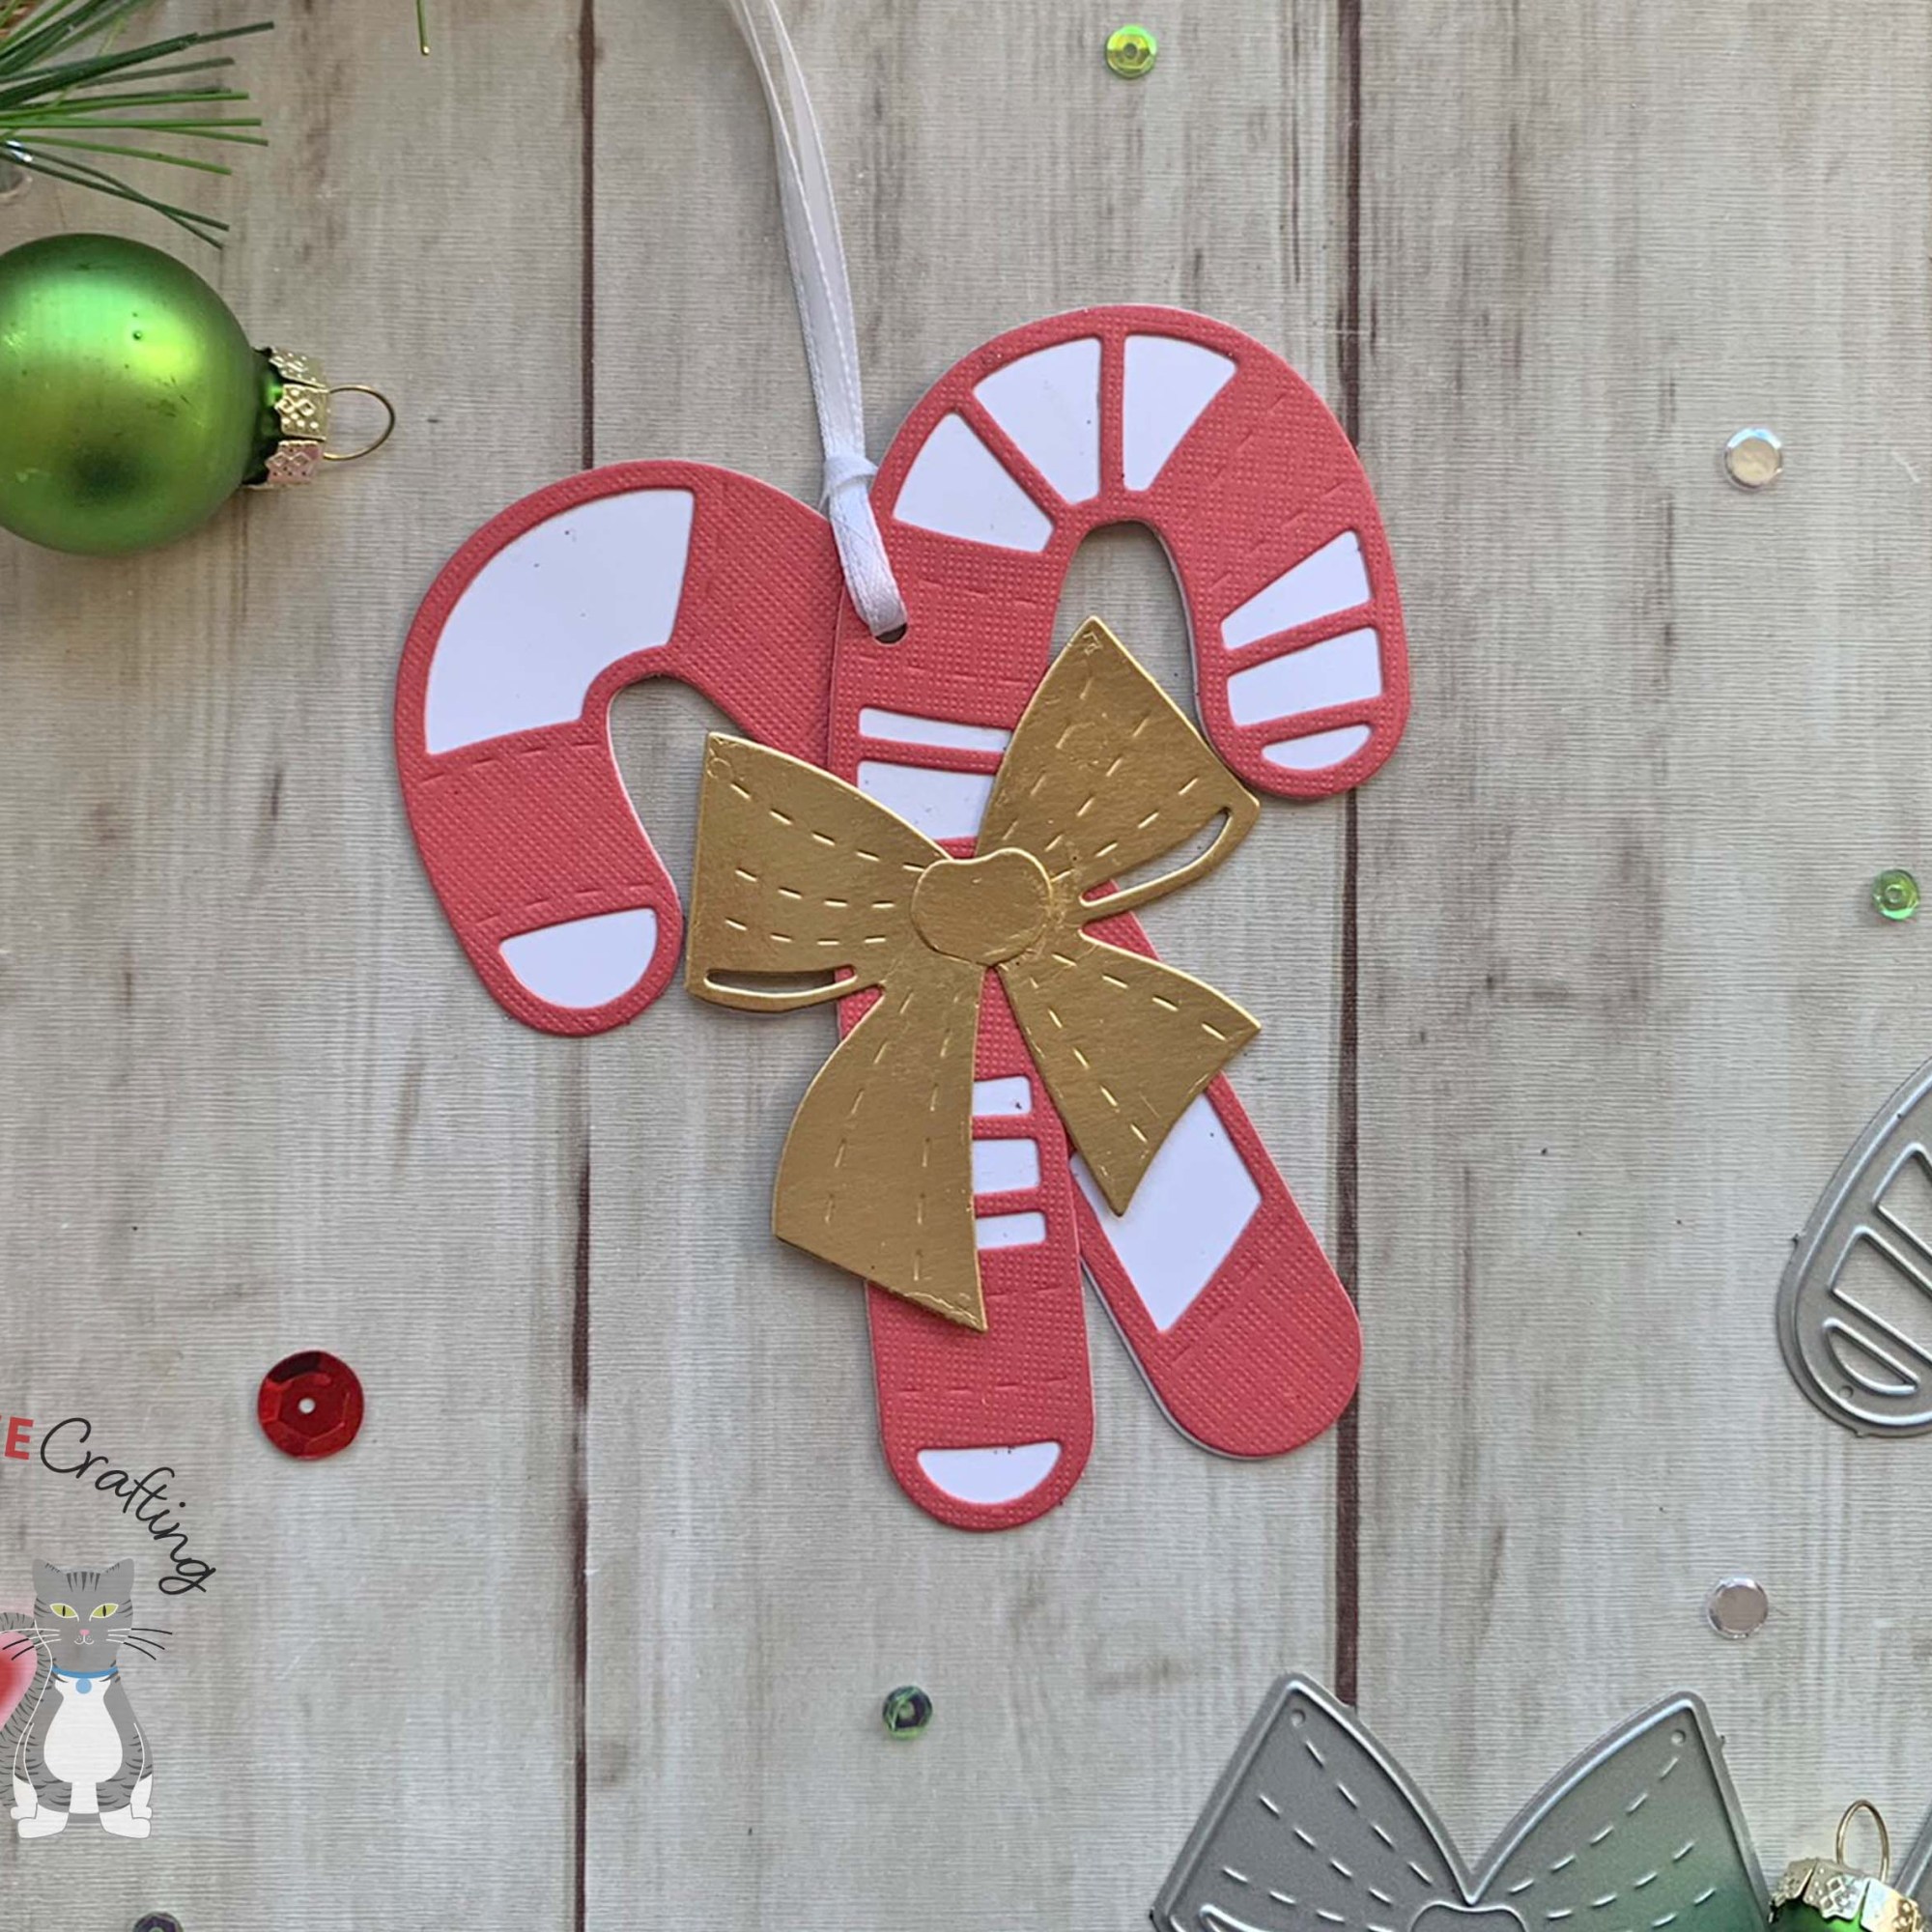
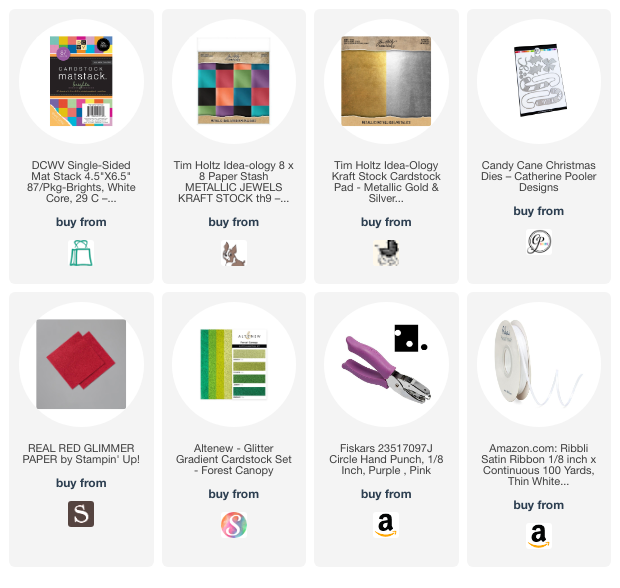
Hello friends. Need some quick cute holiday tags or tree ornaments?!? The Catherine Pooler Designs Candy Cane Christmas Dies is a great die set to create those! Let’s see how easy it was to make these.

I die cut a bunch of the candy cane backer pieces from Neenah 100lb Classic Crest Cardstock 8.5 X 11″ using the Catherine Pooler Designs Candy Cane Christmas Dies. Then cut candy canes and bows from Altenew Glitter Gradient Cardstock Set, Tim Holtz Idea-Ology 8 x 8 Metallic Gold & Silver Kraft Stock Cardstock, Tim Holtz idea-ology 8 x 8 Metallic Jewels Kraft Stock, Stampin’ Up! Sweet Sugarplum 6 x 6 Glimmer Cardstock (retired), Stampin’ Up! Real Red 12 x 12 Glimmer Cardstock (retired) and DCWV Single-Sided Brights Mat Stack 4.5″ x 6.5″. I inlayed some of the candy cane pieces as well.

After adhering all the candy canes, I punched a 1/8″ hole in each and added some ribbon to each. I used 1/8″ white satin ribbon. You can make single candy cane tags/ornaments or double one! So fun and really east to make a bunch at once.


Supplies

https://linkdeli.com/widget.js?id=f5e8378456858c916708

Thanks for reading this post. I hope Iโ€™ve inspired you to make some cute candy cane holiday tags and ornaments! Leave comments or questions below or feel free to email.

Cards, Christmas, interactive, Shaker

Two Slimline Holiday Cards Using One Die, Two Ways feat. Catherine Pooler Designs

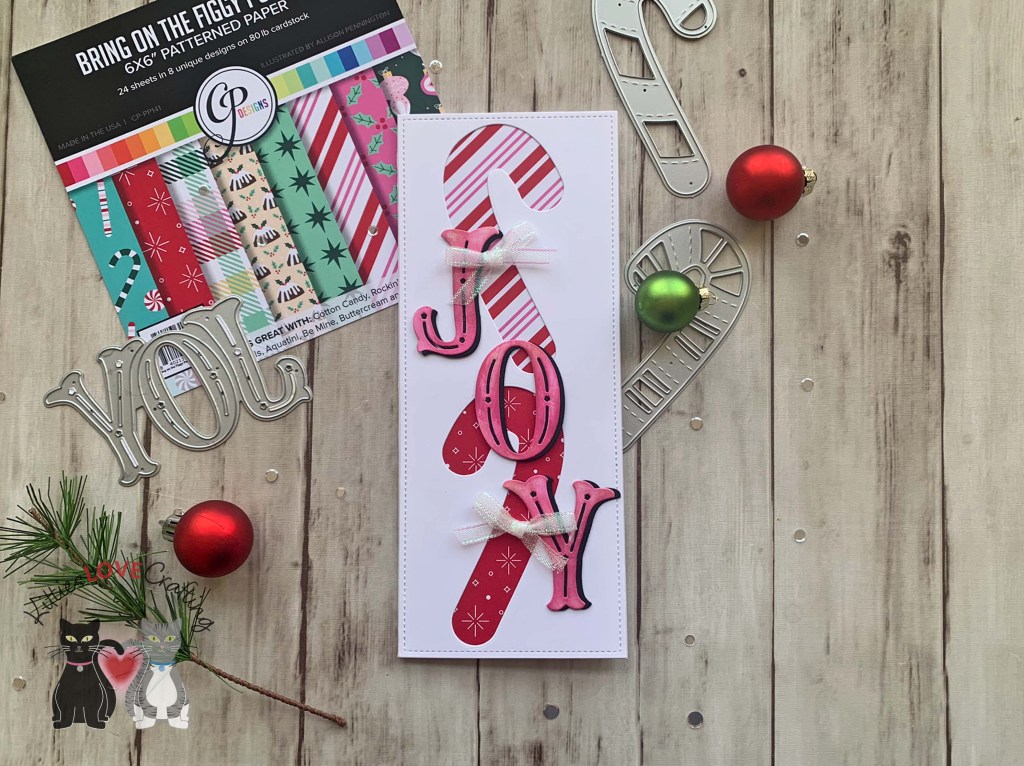
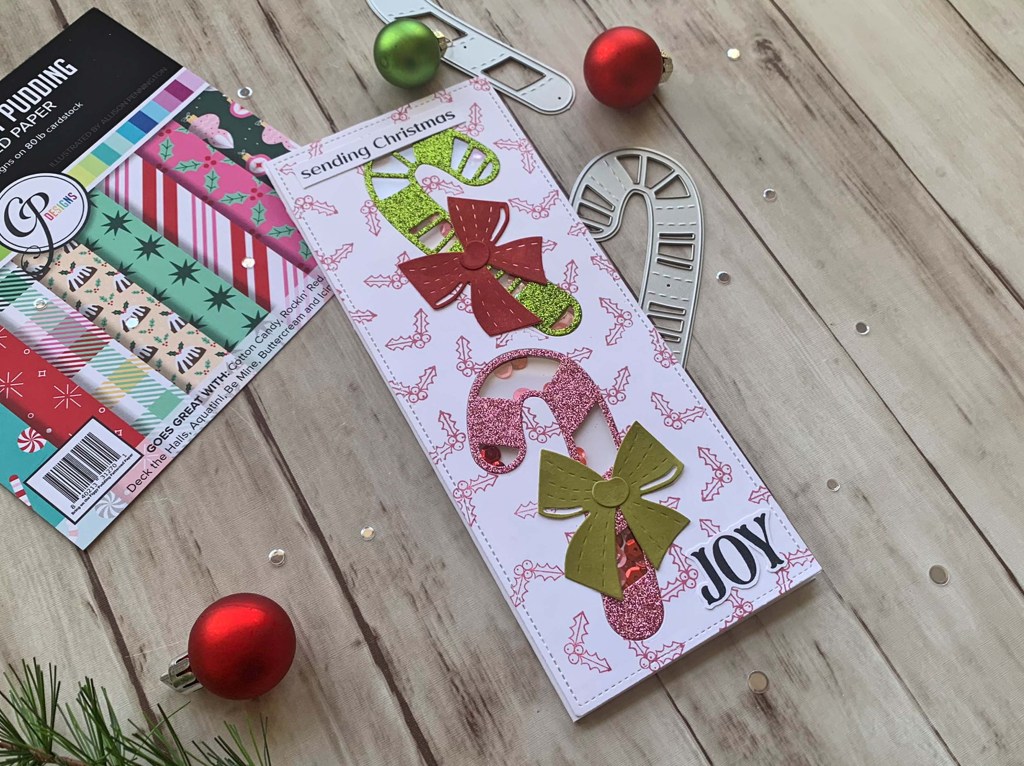
Hello friends. Here’s a fun way to use the same dies to get two different looks. My cards feature the Catherine Pooler Designs Candy Cane Christmas and Festive Joy Word Dies.
One card uses the Candy Cane Christmas dies as a background for a large dimensional sentiment and the other uses the same dies as the focal image which are shakers.

For the first card, I cut a piece of Neenah 100lb Classic Crest Cardstock 8.5 X 11″ to 7 x 8-1/2″ and scored at 3-1/2″ to create a slimline card base as well as a piece which I die cut with the Lawn Fawn Large Slimline with Sliders. This piece measures 3-1/2 x 8-1/2″.

I die cut the candy canes from the back panel using the base candy cane dies from the Catherine Pooler Designs Candy Cane Christmas Dies. Then added pattern paper behind them from CP Bring on the Figgy Pudding Patterned Paper and Under the Tree Slimline Patterned Paper (discontinued).

I die cut the JOY from both Neenah 100lb Classic Crest Cardstock 8.5 X 11″ and Lawn Fawn Black Licorice Cardstock. I colored the white letters using the CP Be Mine Ink and offset the black letters behind. I added some glitter with a Spectrum Noir Clear Overlay Sparkle Pen.

I finished it off by adding some Stampin’ Up! Snowflake Splendor 1/4″ (6.4 mm) Ribbon (retired). I left the inside of the card blank.

Dimensions


For the second card, I cut a piece of Neenah 100lb Classic Crest Cardstock 8.5 X 11″ to 7 x 8-1/2″ and scored at 3-1/2″ to create a slimline card base as well as a piece which I die cut with the Lawn Fawn Large Slimline with Sliders. This piece measures 3-1/2 x 8-1/2″.

Again, I die cut the candy canes from the back panel using the base candy cane dies from the Catherine Pooler Designs Candy Cane Christmas Dies. I stamped the holly leaves from the Catherine Pooler Holiday Joy Sentiments Stamp Set with CP Rose Petals Ink. I added some acetate behind it to make a shaker.

I die cut the two candy canes from Stampin’ Up! Sweet Sugarplum 12 x 12 Glimmer Paper (retired) and Titanite from Altenew Forest Canopy Glitter Gradient Cardstock using CP Candy Cane Christmas Dies. The bows were die cut from Neenah 100lb Classic Crest Cardstock 8.5 X 11″ and colored them CP inks. I used Rouge and Green Tea inks. I inlayed the candy canes and adhered them to the acetate. This makes them look like they are floating and creates a fun shaker.

I stamped the sentiment from Catherine Pooler Holiday Joy Sentiments Stamp Set onto Neenah 100lb Classic Crest Cardstock 8.5 X 11″ with Tsukineko Memento Tuxedo Black Ink.

Dimensions


Supplies

https://linkdeli.com/widget.js?id=f5e8378456858c916708

Thanks for reading this post. I hope Iโ€™ve inspired you to make these slimline holiday cards! Leave comments or questions below or feel free to email.

Cards, Christmas, Slimline

Adding Dimension to Die Cuts with Markers: Peppy Penguin Slimline Card

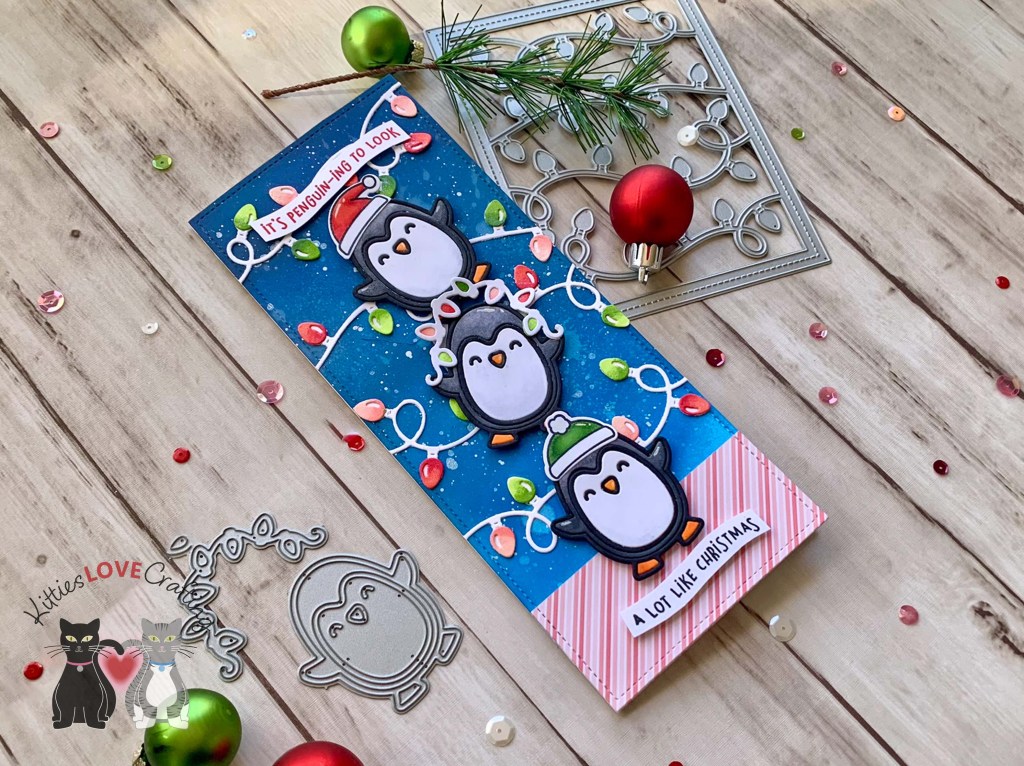
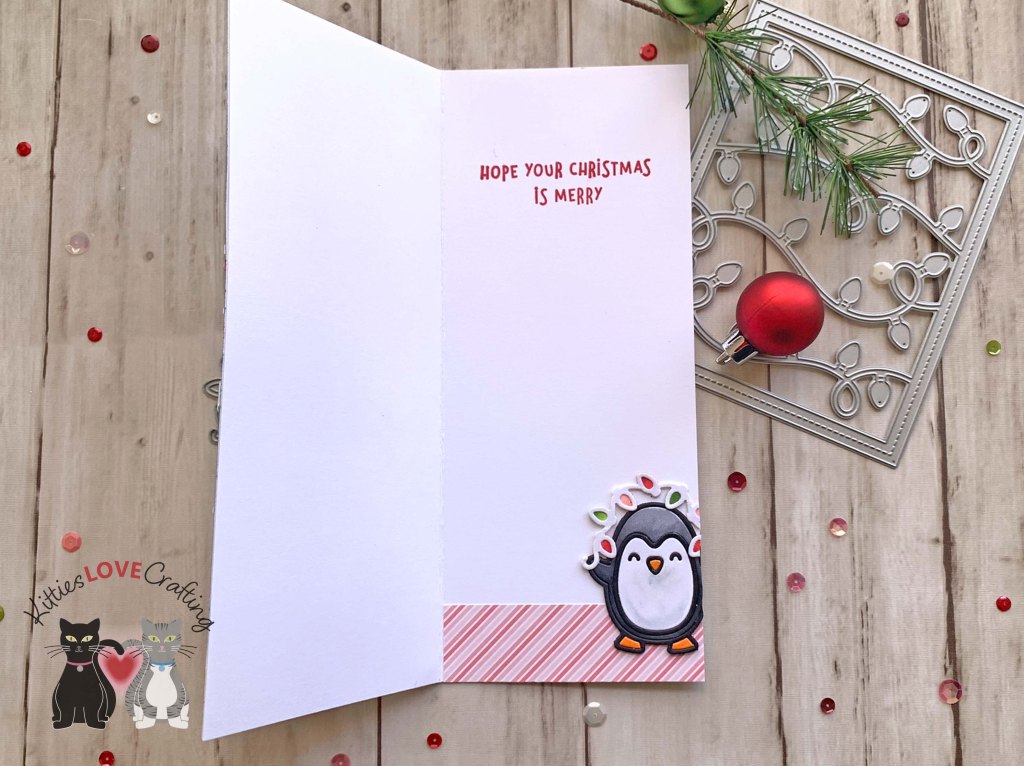
Hello friends. Once again, I cannot resist using this cute penguin die set from Lawn Fawn. I knew I had to have this little penguin when the release came out! He is very versatile and can be used for many occasions. On this card, I have three penguins precariously perched on top of each other. So very cute!!!

For this card, I cut a piece of Neenah 100lb Classic Crest Cardstock 8.5 X 11″ to 7 x 8-1/2″ and scored at 3-1/2″ to create a slimline card base. I die cut another piece with the Lawn Fawn Large Slimline with Sliders. I used the largest die which measures 3-1/2 x 8-1/2″ and gives it a stitched edge. I also cut a piece of Lawn Fawn Stripes ‘n Sprinkles 6×6 Inch Petite Pack to 1-1/2 x 3-1/2″ then used the slimline die to add the stitched lines on the border.

For the background, I used Tim Holtz Salty Ocean and Chipped Sapphire Distress Oxide Inks to ink blend. Then sprayed some water on it and added splatters with some pearlescent white acrylic paint.

I die cut all the penguins and the lights from Neenah 100lb Classic Crest Cardstock 8.5 X 11″ with the Lawn Fawn Peppy Penguin and String of Lights Backdrop and colored them with Copic markers. I used 100, N2, N5 & N7, N0 & 0 and YR04 for the penguin; YG01 & YG25, YG25 & YG67, R30 & R32, and R14 & R29 for the lights. I stamped the hats from Frosty Family Stampset onto Neenah 100lb Classic Crest Cardstock 8.5 X 11″ with Memento Tuxedo Black Ink. I used Copic Markers to color them. I used R14 & R27, YG17 & YG67, C1 & 0.

I finished off the card by adding some highlights to the hats with a white gel pen and sparkly to the lightbulbs with my Spectrum Noir Clear Overlay Sparkle Pen.

On the inside of the card, I added a strip of pattern paper from Lawn Fawn Stripes ‘n Sprinkles 6×6″ Petite Pack cut to 1 x 3-1/2″ and added another penguin. I stamped the sentiment from the Lawn Fawn Here We Go A-Waddling Stamps with Stampin’ Up! Poppy Parade Ink.

Dimensions


Supplies

https://linkdeli.com/widget.js?id=f5e8378456858c916708

Thanks for reading this post. I hope Iโ€™ve inspired you to give this cute slimline penguin card a try for yourself. Leave comments or questions below or feel free to email.

Cards, Christmas

Holiday Lights Card feat. Lawn Fawn String of Lights

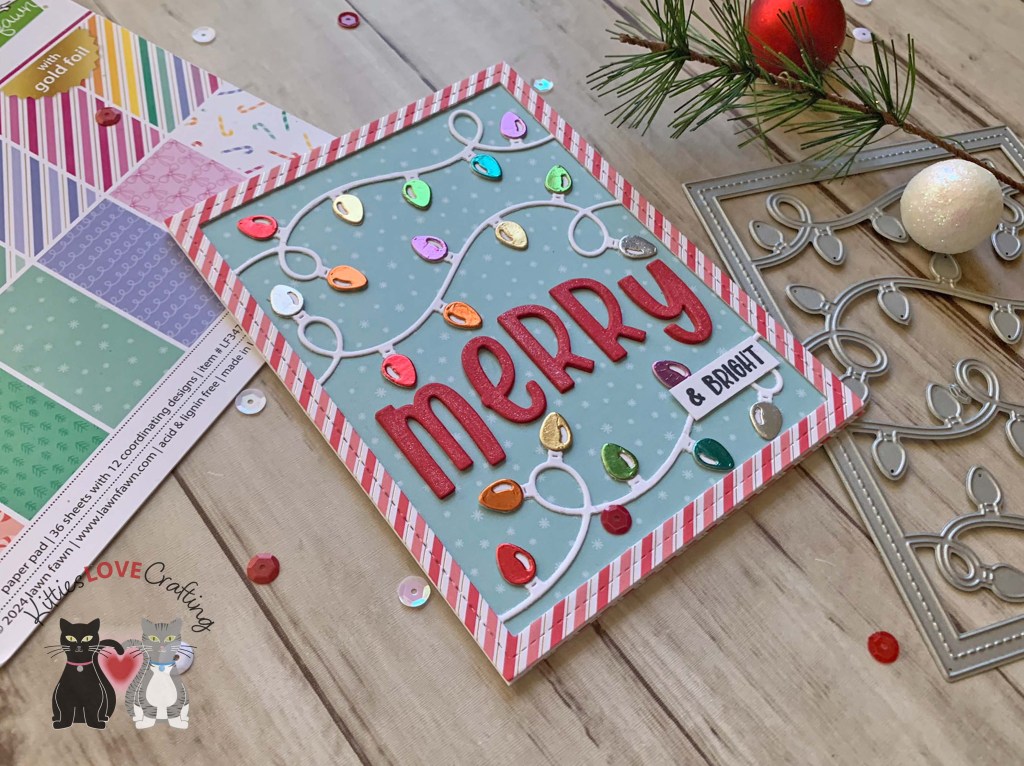
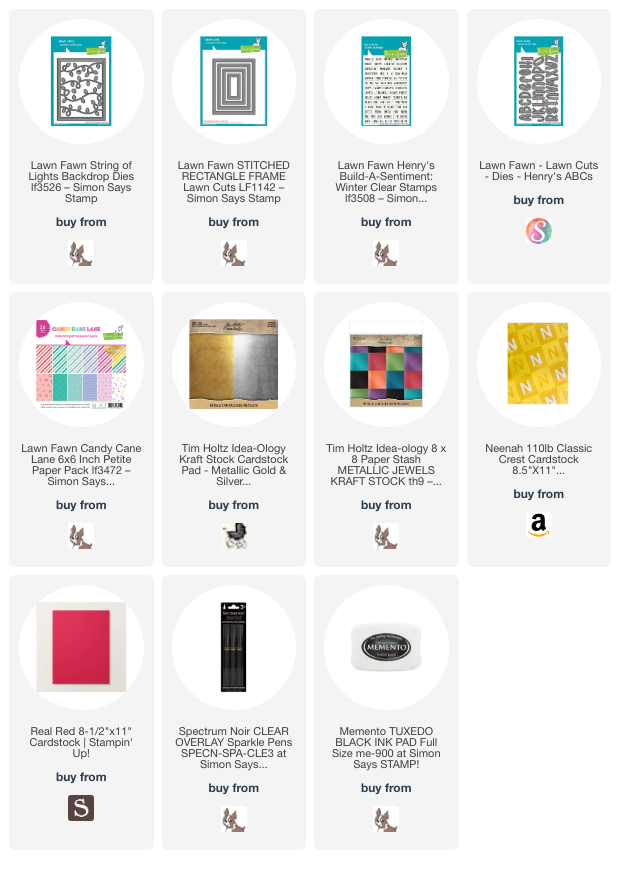
Hello friends. Need a quick card for the holidays?!? The Lawn Fawn String of Lights Backdrop Die makes that very easy! Actually this die could be used for other occasions – Halloween, Valentine’s Day cards… So many combinations are available with this die set.
Stay tuned for future blog posts showing how I use pieces of this die on other cards.

For this card, I cut a piece of Neenah 100lb Classic Crest Cardstock 8.5 X 11″ to 5-1/2 x 8-1/2″ and scored at 4-1/4″ as well as a piece of Lawn Fawn Candy Cane Lane 6 x 6″Inch Paper Pack to 4-1/4 x 5-1/2″ for the background.

I die cut the lights background from Neenah 100lb Classic Crest Cardstock 8.5 X 11″ using the Lawn Fawn String of Lights Backdrop Die and the frame from Lawn Fawn Candy Cane Lane 6 x 6″Inch Paper Pack using the largest frame from the Lawn Fawn Stitched Rectangle Frame.

I die cut the light bulbs from Tim Holtz idea-ology Metallic Jewels 8 x 8 Kraft Stock and Tim Holtz Idea-ology Metallic Gold & Silver Kraft Stock.

For the sentiment, I die cut the word ‘ Merry’ from Stampin’ Up! Real Red 8-1/2 x 11″ Cardstock using the Lawn Fawn Henry’s ABCs and stamped a sentiment from Lawn Fawn Henry’s Build-A-Sentiment: Winter Stamps onto Neenah 100lb Classic Crest Cardstock 8.5 X 11″ with Tsukineko Memento Tuxedo Black Ink. I added some shimmer to the die cut word with a Spectrum Noir Clear Overlay Sparkle Pen.

On the inside of the card, I cut a piece of Lawn Fawn Candy Cane Lane 6 x 6″ Inch Paper Pack to 1 x 4-1/4″.

Dimensions


Supplies

https://linkdeli.com/widget.js?id=f5e8378456858c916708

Thanks for reading this post. I hope Iโ€™ve inspired you to make this holiday card! Leave comments or questions below or feel free to email.

Cards, Christmas

Christmas Gnome Card featuring Trinity Stamps

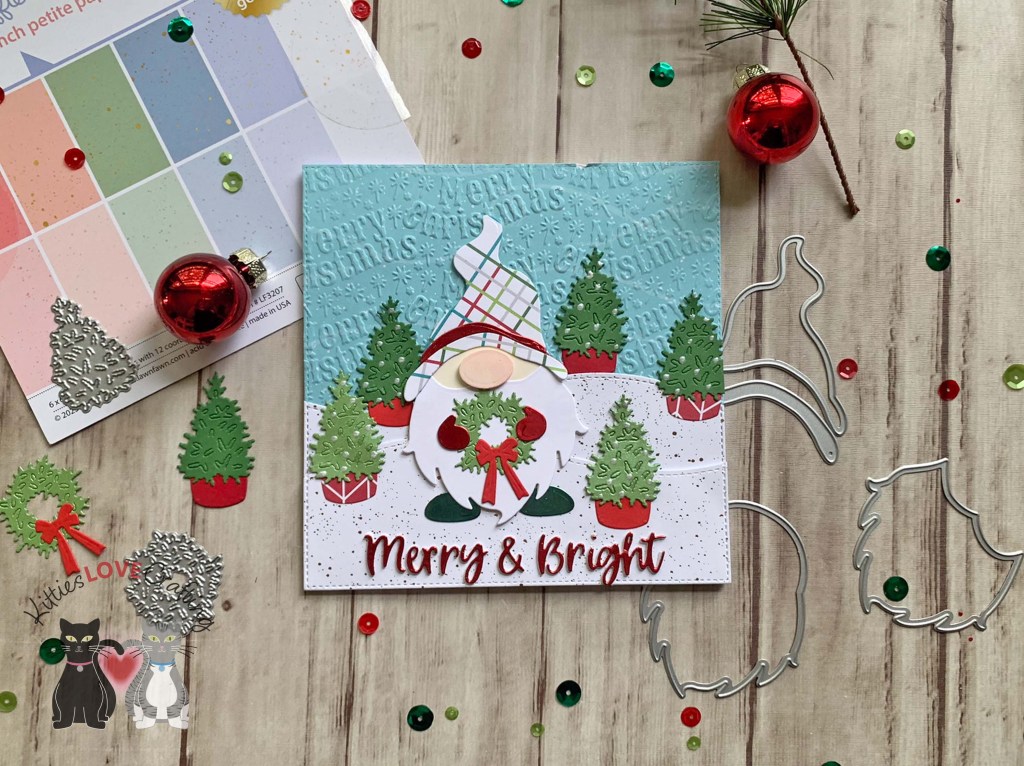
Hello friends. This cute gnome Christmas card features the cute little gnome from the Trinity Stamps Springtime Gnome dieset.

For this card, I cut a piece of Neenah 100lb Classic Crest Cardstock 8.5 X 11″ to 5-1/2 x 11″ and scored at 5-1/2″ to create a square card base, a piece of pattern paper from my stash for the background which I die cut using the Queen & Company Foundation 16. I embossed the panel using the Embossalicious Christmas Merriment Embossing Folder (discontinued) to add some texture.

I die cut the hillsides from Lawn Fawn Spiffier Speckles 6×6 Inch Paper using the Lawn Fawn Stitched Hillside Borders and Queen & Company Foundation 16 and used Foam Tape to pop up the front hillside.

I die cut the gnome using the Trinity Stamps Springtime Gnome. I used Stampin’ Up! Very Vanilla 8-1/2″ X 11″ Cardstock for the face and nose (I also used some Spun Sugar Distress Ink to color them), Neenah 100lb Classic Crest Cardstock 8.5 X 11″ for his beard, Reverse Confetti Very Merry 6 x 6 Paper (discontinued) for his hat, Tim Holtz Metallic Idea-ology 8 x 8 Metallic Jewels Kraft Stock Paper for his hat band, hands and feet.

I die cut the wreath and trees using the Scrappy Tails German and American Christmas House Add-On Metal Craft Die. I used Crafters Companion Shimmering Cardstock 8 x 8 Green Envy (discontinued) and Garden Green 8-1/2″ X 11″ Cardstock for the trees and Stampin’ Up! Poppy Parade 8-1/2″ X 11″ Cardstock, Stampin’ Up! Real Red 8-1/2″ X 11″ Cardstock, and Reverse Confetti Very Merry 6 x 6 Paper (discontinued) for the bases.

I die cut the sentiment 1x from Tim Holtz Metallic Idea-ology 8 x 8 Metallic Jewels Kraft Stock Paper and 2x from Neenah 100lb Classic Crest Cardstock 8.5 X 11″ using the Queen & Company Sentiment Stacker Dies #1 (discontinued). I finished off the card by adding some Tonic IVORY SEASHELL Nuvo Crystal Drops to the trees.

On the inside of the card, I added a strip of pattern paper from Reverse Confetti Very Merry 6 x 6 Paper (discontinued) cut to 1 x 5-1/2″ and a piece of Tim Holtz Metallic Idea-ology 8 x 8 Metallic Jewels Kraft Stock Paper cut to 1-1/4 x 5-1/2″.

Dimensions


Supplies

https://linkdeli.com/widget.js?id=f5e8378456858c916708

Thanks for reading this post. I hope Iโ€™ve inspired you to give this cute gnome Christmas card a try for yourself. Leave comments or questions below or feel free to email.

Autumn, Cards, Window Cards

Using Up Scraps to Create A Background feat. Catherine Pooler Designs Count to Six Cover Plate

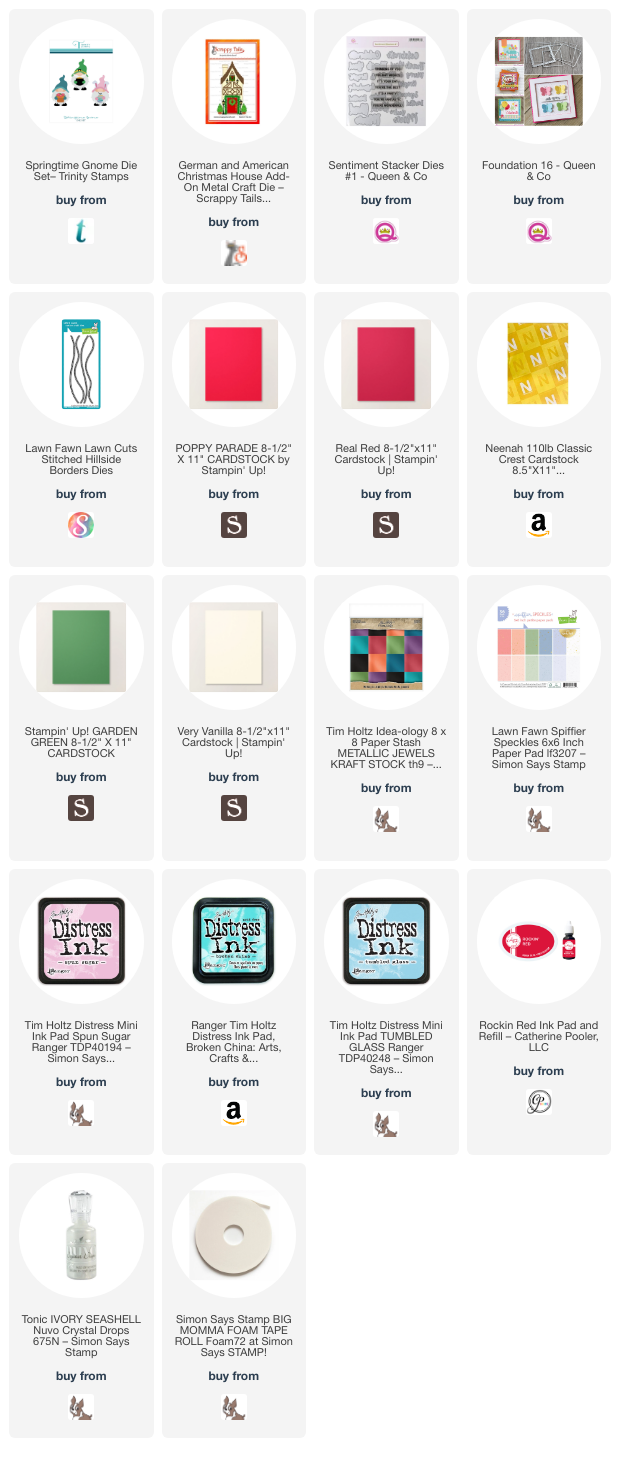
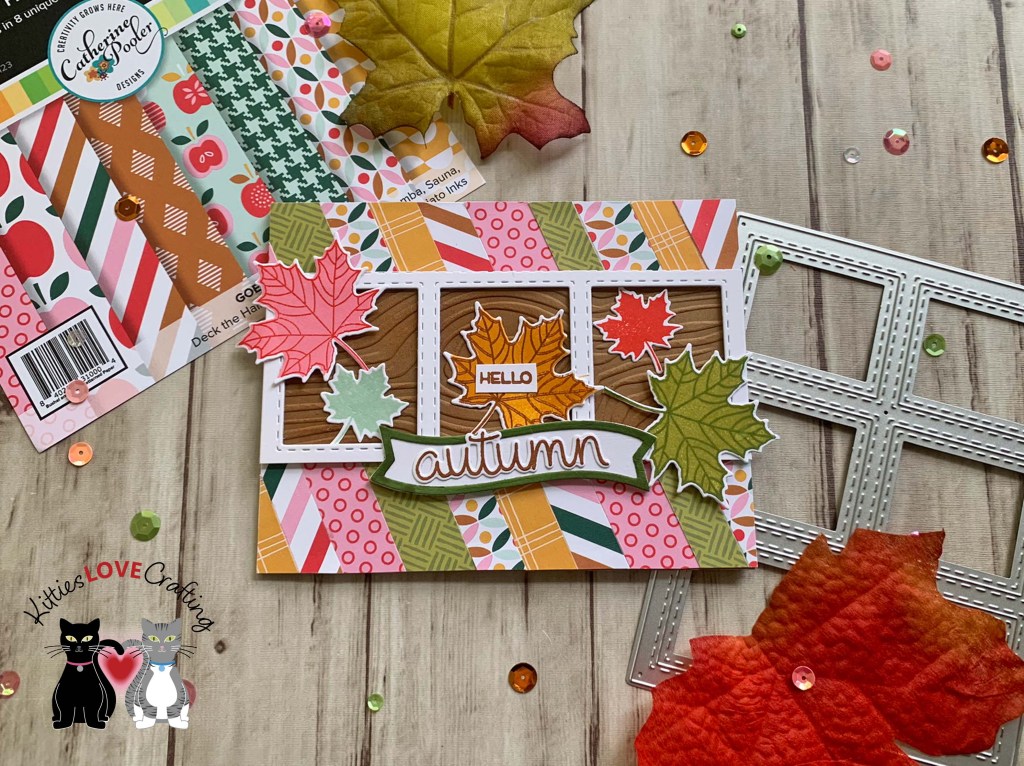
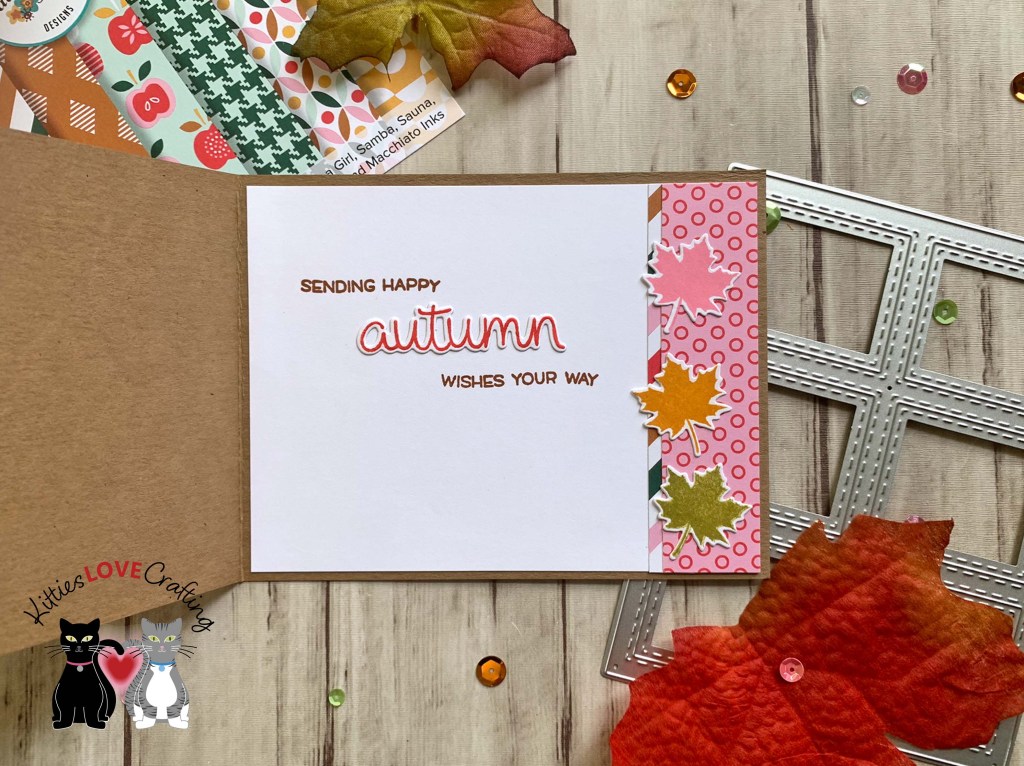
Hello friends. For this card, I thought I’d use up some of my patterned paper scraps. You can easily make a quick and impactful background using strips of cardstock and pattern papers. I used the Catherine Pooler Designs Count to Six Cover Plate to create my focal image but as you’ll see I did a little something different to it to make it work for this card!

For this card, I cut a piece of Lawn Fawn Paper Bag 100lb Cardstock to 5-1/2 x 8-1/2″ and scored at 4-1/4″. I cut strips of pattern paper from Catherine Pooler Designs Sunflower Fields Forever 6 x 6 Patterned Paper and Bushel and a Peck 6 x 6 Patterned Paper and adhered them on a diagonal onto the card base, trimming off any excess.

I die cut the Catherine Pooler Designs Count to Six Cover Plate (included in the Boo Box) 3x from Neenah 100lb Classic Crest Cardstock 8.5 X 11″ and cut off about half of each panel to create my window strip. Behind the panel I cut a piece of Lawn Fawn Paper Bag 100lb Cardstock and ran it through my die cut machine with the Darice Woodgrain Embossing Folder Background. I also used some CP Spiced Ink to add some color over the raised areas of the panel.

I stamped the several leaves from the Stampin’ up! Colorful Seasons Stampset (retired) onto Neenah 100lb Classic Crest Cardstock 8.5 X 11″ with CP It’s a Girl, Samba, Sauna, Spiced, Green Tea, Eucalyptus, and Wintergreen inks. And cut them using the coordinating dies.

I stamped the sentiment from the Lawn Fawn Scripty Autumn Sentiments onto Neenah 100lb Classic Crest Cardstock 8.5 X 11″ with CP Spiced Ink. I used the coordinating dies for the ‘autumn’ and hand trimmed the ‘hello’. I also die cut a banner from the Lawn Fawn Fancy Wavy Banner set (I think this may get discontinued soon) from Neenah 100lb Classic Crest Cardstock 8.5 X 11″ and colored the border with Eucalyptus ink.

On the inside of the card, I cut a piece of Neenah 100lb Classic Crest Cardstock 8.5 X 11″ to 4 x 5-1/4″ and two pieces of Catherine Pooler Designs Bushel and a Peck 6 x 6 Patterned Paper to 1 x 4″ and 1-1/4 x 4″. I stamped a sentiment from the Lawn Fawn Scripty Autumn Sentiments with CP Spiced and Eucalyptus Inks and some more leaves.

Dimensions


Supplies

https://linkdeli.com/widget.js?id=f5e8378456858c916708

Thanks for reading this post. I hope Iโ€™ve inspired you to give this technique a try and your own faux embossed background! Leave comments or questions below or feel free to email.

Card kits, Christmas, Distress Ink Techniques, Embossed Background, Watercolor techniques

Easy Watercolor Backgrounds 5 Ways

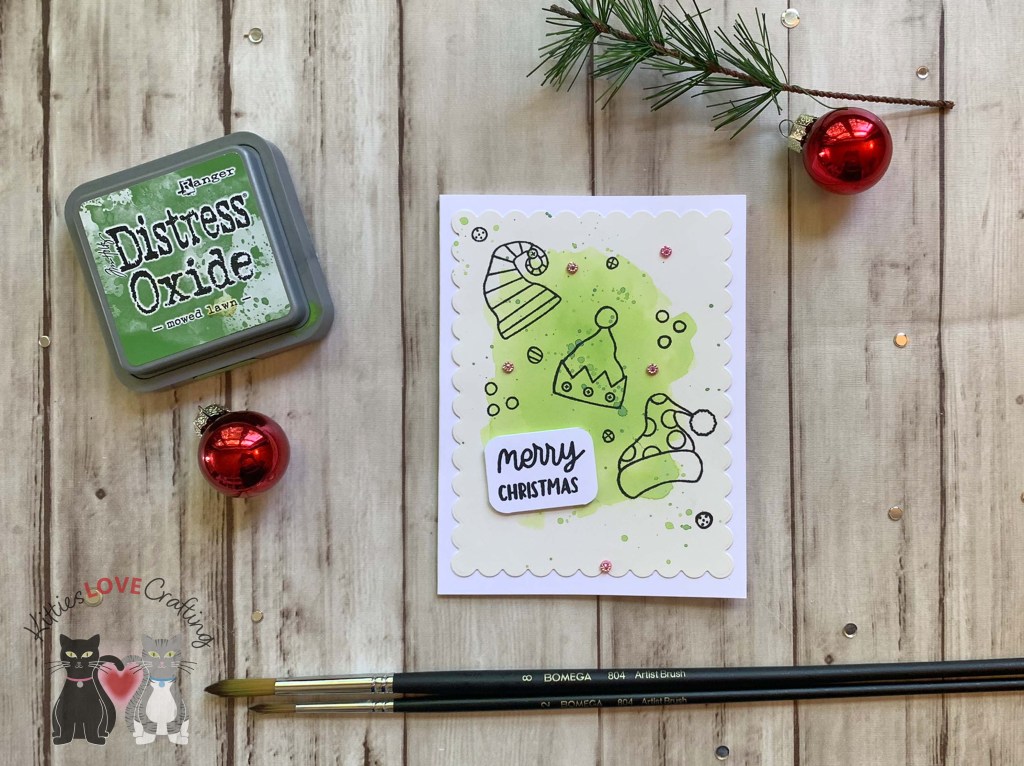
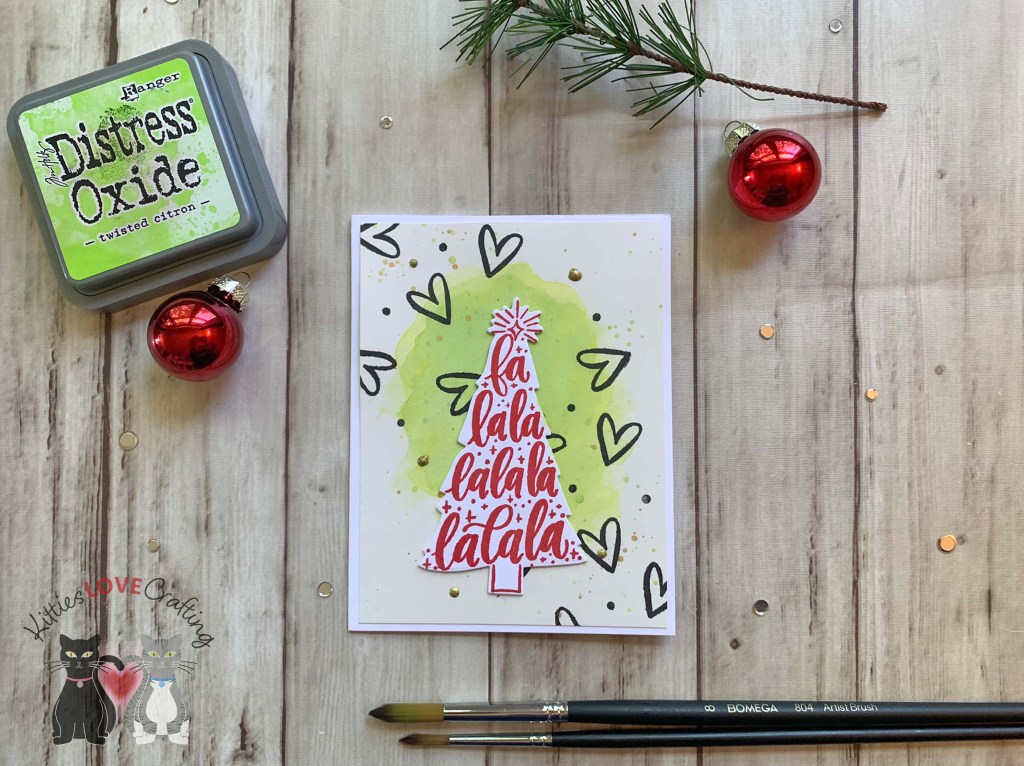
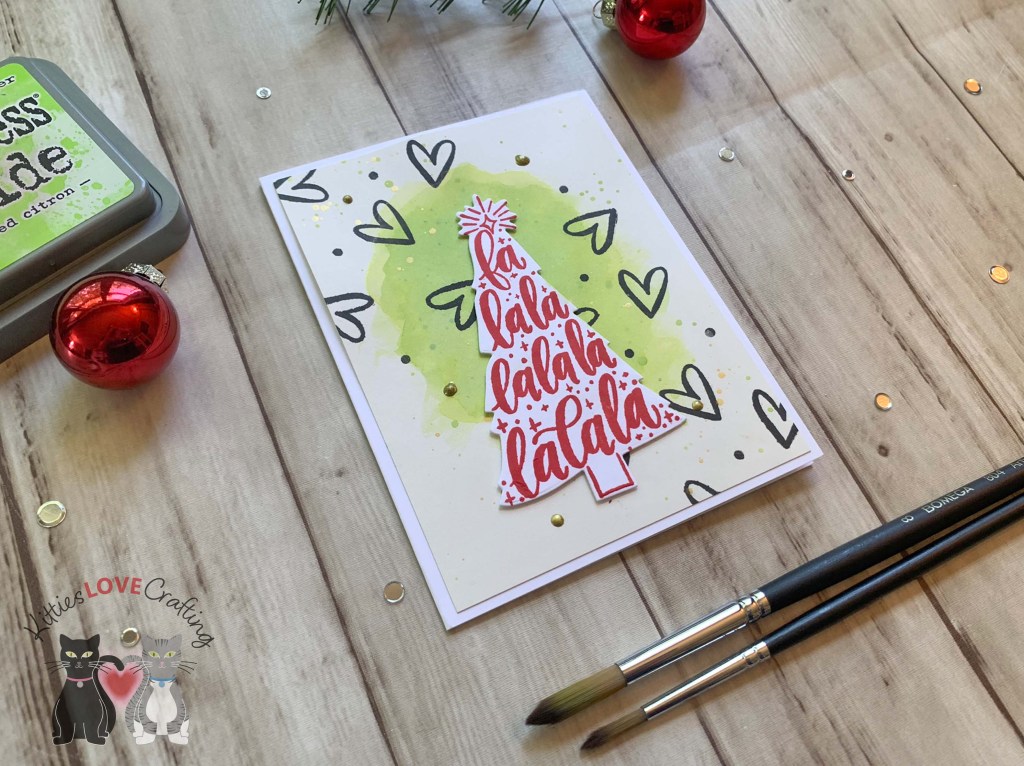
Hello friends. It’s time to create some Christmas cards! It’s never too early to start. I decided to try making some very easy watercolored cards using older products I already have. These cards can easily be mass-produced which was my objective. I used all watercolor backgrounds but stepped up a few with embossing folders. It takes very little effort but produces great results!!!

I started these cards by choosing some inks for the backgrounds. I used Tim Holtz Kitsch FlamingoFestive Berries, Twisted Citron, Mowed Lawn, and Mermaid Lagoon Distress Oxide Inks. I also cut 5 pieces of Strathmore 300 Series Smooth Bristol Paper to 4-3/4 x 5-1/4″. I added splatters to all the panels with the same ink and then on the green panel I also used Gold Acrylic Paint for splatter and the Silver Paint for the Mermaid Lagoon panel.

For the first card, I cut a piece of Neenah 100lb Classic Crest Cardstock 8.5 X 11″ to 5-1/2 x 8-1/2″ and scored at 4-1/4″ to create a card base. I die cut the background with the Catherine Pooler Designs Scallops & Dots Dies.

I stamped images from the Catherine Pooler Designs Nice List stamp set (discontinued) onto the card with Catherine Pooler Designs Midnight Ink. And a sentiment onto Neenah 100lb Classic Crest Cardstock 8.5 X 11″ with the same black ink.

I finished it off by adding Queen and Co Petite Posies in Purple.

I left the inside of the card blank

Dimensions


For the second card, I cut a piece of Neenah 100lb Classic Crest Cardstock 8.5 X 11″ to 4-1/2 x 11″ and scored at 5-1/2″ to create a card base. I cut a piece of Tim Holtz Idea-ology 8 x 8 METALLIC KRAFT STOCK Paper to 4 x 5-1/4″. I stamped snowflakes from Catherine Pooler Designs Joyful Flakes (unavailable) with Catherine Pooler Designs Midnight Ink, and Versamarkย Ink and Ranger Silver Embossing Powder.

I stamped the sentiment from the same stamp set with the silver embossing powder as well. I finished the card by adding some flat silver sequins from my stash.

Dimensions


For the third card, I cut a piece of Neenah 100lb Classic Crest Cardstock 8.5 X 11″ to 5-1/2 x 8-1/2″ and scored at 4-1/4″ to create a card base. I stamped hearts onto the background from Catherine Pooler Designs Caroling Sentiments with Catherine Pooler Designs Midnight Ink. Then stamped the tree sentiment from the same set onto Neenah 100lb Classic Crest Cardstock 8.5 X 11″ with Rockin’ Red Ink and die cut it with the coordinating dies.

I finished it off by adding Nuvo Crystal Drops in Metallic Bright Gold.

On the inside of the card, I stamped a sentiment from Catherine Pooler Designs Wrapped and Ready Stamp Set with Tim Holtz Mowed Lawn Distress Oxide Ink.

Dimensions


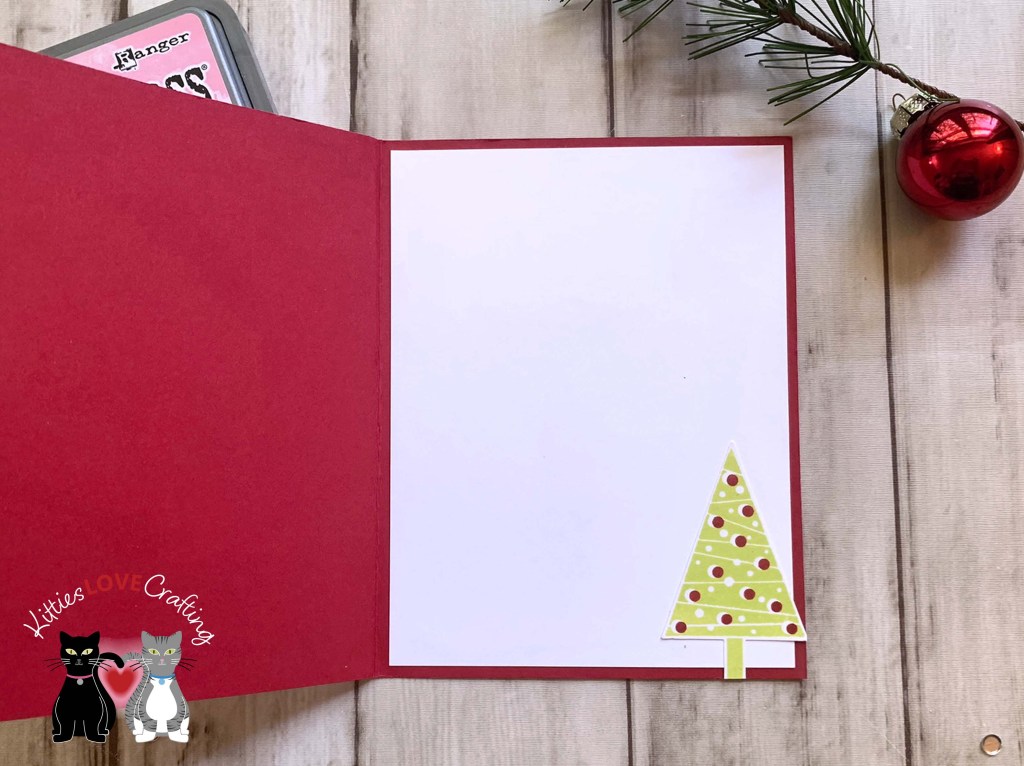
For the fourth card, I cut a piece of Stampin’ Up! Real Red 8-1/2″ X 11″ Cardstock to 5-1/2 x 8-1/2″ and scored at 4-1/4″ to create a card base. I ran the watercolored panel through my die cut machine using the Darice Wired Fence Embossing Folder (unavailable).

I stamped the trees from Stampin’ Up! Festival of Trees Stampset (retired) onto Neenah 100lb Classic Crest Cardstock 8.5 X 11″ with Catherine Pooler Designs Pucker Up, Rockin’ Red, and Martini Inks. And used the coordinating punch to cut them out. I popped them up with 3M Foam Tape.

I stamped a sentiment from the same set onto Neenah 100lb Classic Crest Cardstock 8.5 X 11″ with Catherine Pooler Designs Midnight Ink. Then cut into strips.

I finished the card by adding some Fresh Snowfall Nuvo Glitter Accents.

On the inside of the card, I added another tree stamped with Catherine Pooler Designs Melon Ice Ink.

Dimensions


For the last card, I cut a piece of Neenah 100lb Classic Crest Cardstock 8.5 X 11″ to 4-1/2 x 11″ and scored at 5-1/2″ to create a card base. I ran the watercolored panel through my die cut machine using the Embossalicious Christmas Merriment Embossing Folder (unavailable).

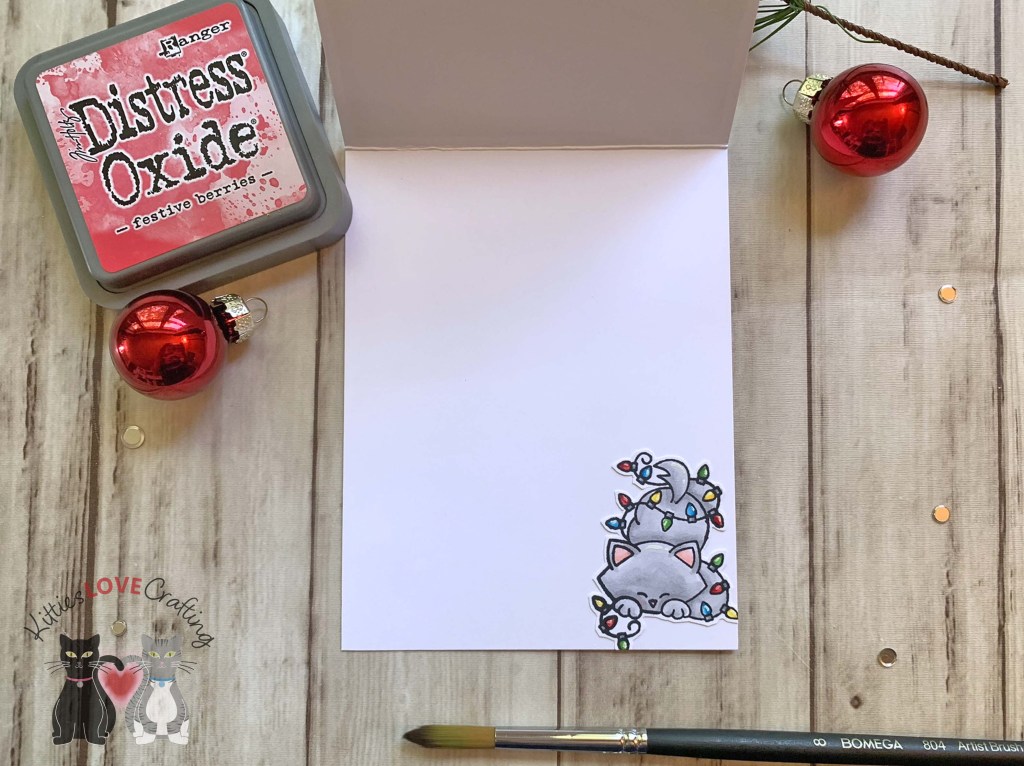
I stamped the kitty from Newton’s Nook Curoius Christmas (retired) onto Neenah 100lb Classic Crest Cardstock 8.5 X 11″ with Memento Tuxedo Black Ink. I used Copic Markers to color the images. I used R20, N0, N2, YG06 & YG17 for the cat; C1 & 0, R14, R27 and R29 for the hat; C1, B0000 and 0 for the milk and cup; E34 and E37 for the cookie; and C3, C5, YG06, YG17, R14, R29, B16, B12, Y02 and Y18. I fussycut the image and popped it up with some Stampin’ Dimensionals.

I stamped a sentiment from the same stamp set onto Neenah 100lb Classic Crest Cardstock 8.5 X 11″ with Memento Tuxedo Black Ink and trimmed it to 5/16 x 1-3/4″.

I finished the card by adding some Nuvo Jewel Drops in Key Lime.

On the inside of the card, I added another kitty image.

Dimensions


Supplies

https://linkdeli.com/widget.js?id=f5e8378456858c916708

Thanks for reading this post. I hope Iโ€™ve inspired you to give this easy watercolor holiday cards a try for yourself. Leave comments or questions below or feel free to email.

Birthdays, Cards, interactive, Shaker

Birthday Cards: Ice Cream Shaker Card feat. Honeybee Stamps Lovely Layers Cupcakes

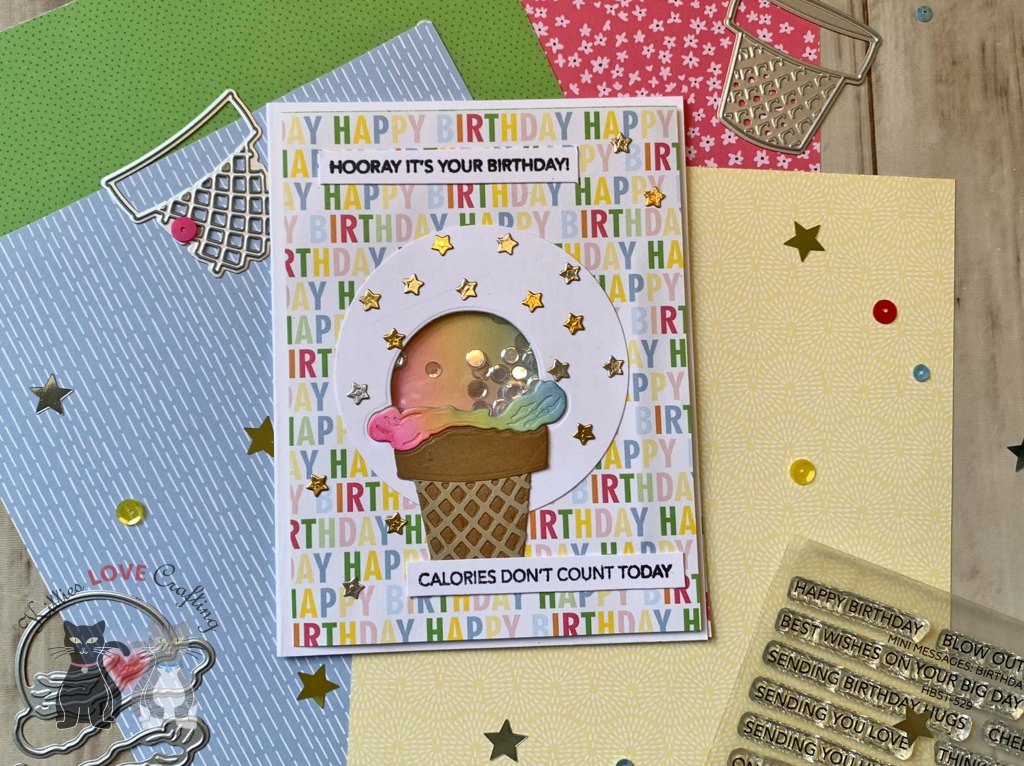
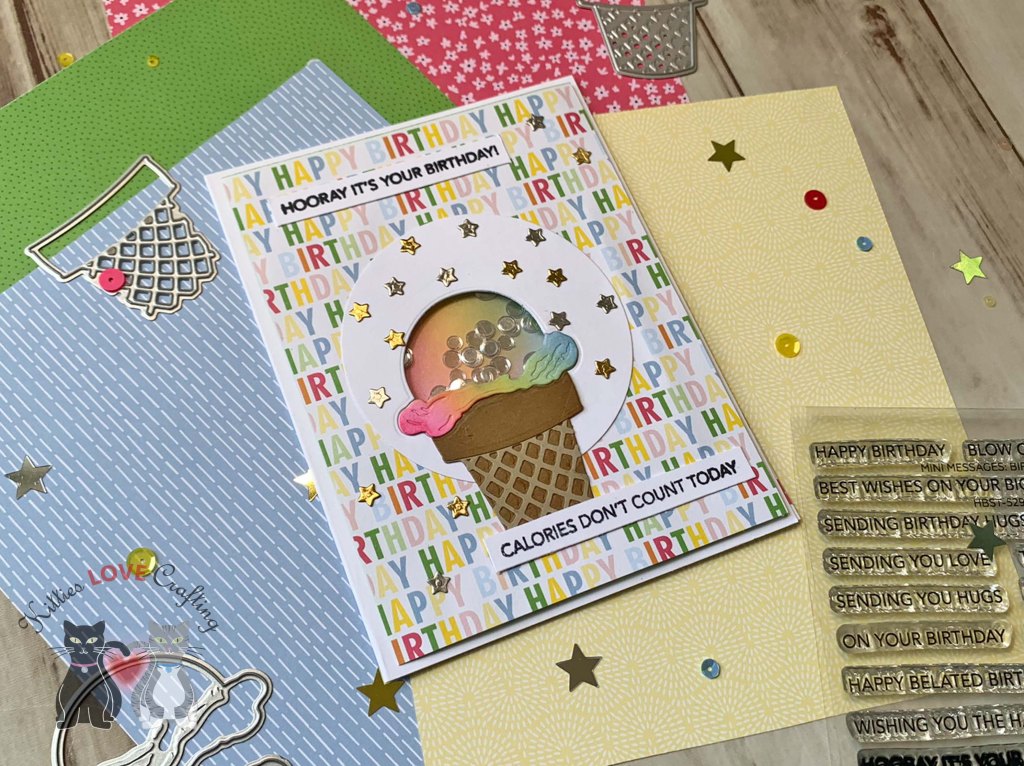
Hello friends. Here’s another quick and easy birthday card using the Lovely Layers: Cupcakes & More die set from Honeybee Stamps. For this one I created a shaker card using the ice cream dies.

For this card, I cut a piece of Neenah 100lb Classic Crest Cardstock 8.5 X 11″ to 5-1/2 x 8-1/2″ and scored at 4-1/4″ to create the card base and another piece of Honey Bee Stamps Let’s Party 6 x 8.5″ Paper to 4 x 5-1/4″.

For the shaker window, I die-cut a [x”] circle from Neenah 100lb Classic Crest Cardstock 8.5 X 11″ using the Sizzix Framelits Circles Die Set. I cut out the window from the circle using the ice cream from Honey Bee Stamps Lovely Layers: Cupcakes & More die-set. For the background of the shaker window, I inked up a piece of Neenah 100lb Classic Crest Cardstock 8.5 X 11″ with Catherine Pooler Party Dress, Whipped Honey, and Stone Blue inks.

I die-cut the rest of the ice cream from Neenah 100lb Classic Crest Cardstock 8.5 X 11″ and colored it with the same inks. I used Stampin’ Up! Crumb Cake 8-1/2″ X 11″ Cardstock and Lawn Fawn Paper Bag Letter Cardstock.

I stamped the sentiment from Honey Bee Stamps Mini Messages: Birthday 4×5 Stamp Set
onto Neenah 100lb Classic Crest Cardstock 8.5 X 11″ with Memento Tuxedo Black Ink.

I finished off the card by adding some starts die-cut from Tim Holtz Idea-ology 8 x 8 Metallic Kraft Stock Paper.

On the inside of the card, I cut a piece of pattern paper from Honey Bee Stamps Let’s Party 6 x 8.5″ Paper to 1-1/4 x 4-1/4″ and 1 x 4-1/4″ and added some more stars.

Dimensions


Supplies

https://linkdeli.com/widget.js?id=f5e8378456858c916708

Thanks for reading this post. I hope Iโ€™ve inspired you to give this cute shaker birthday card a try and use some of your older supplies. Leave comments or questions below or feel free to email.