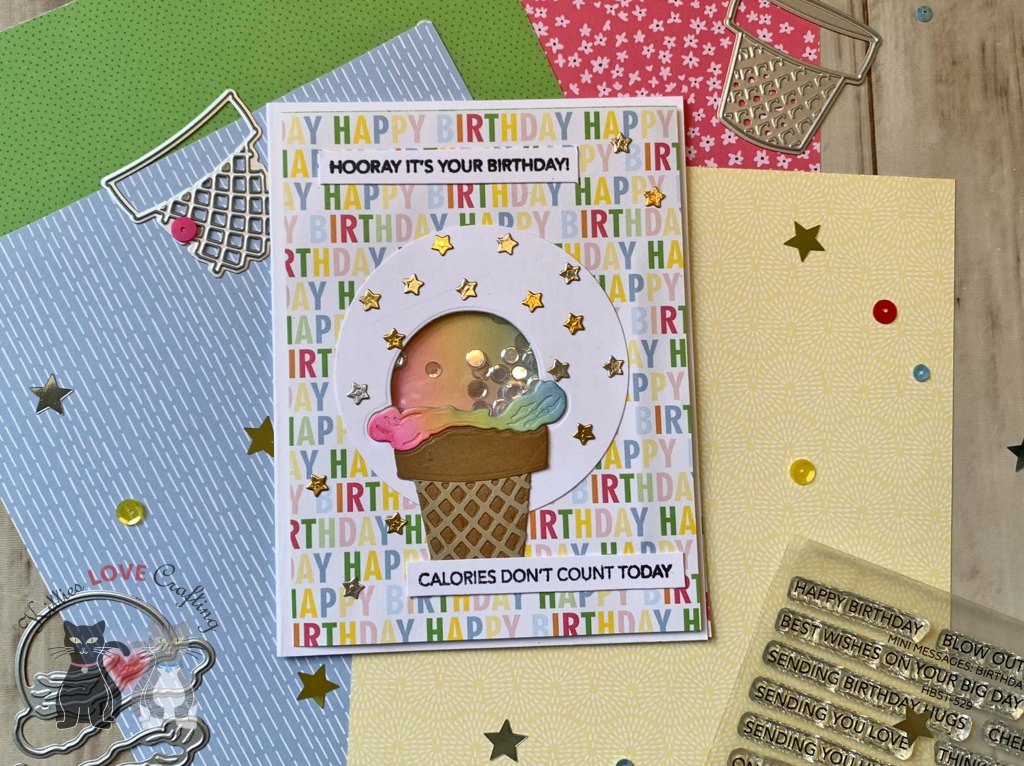
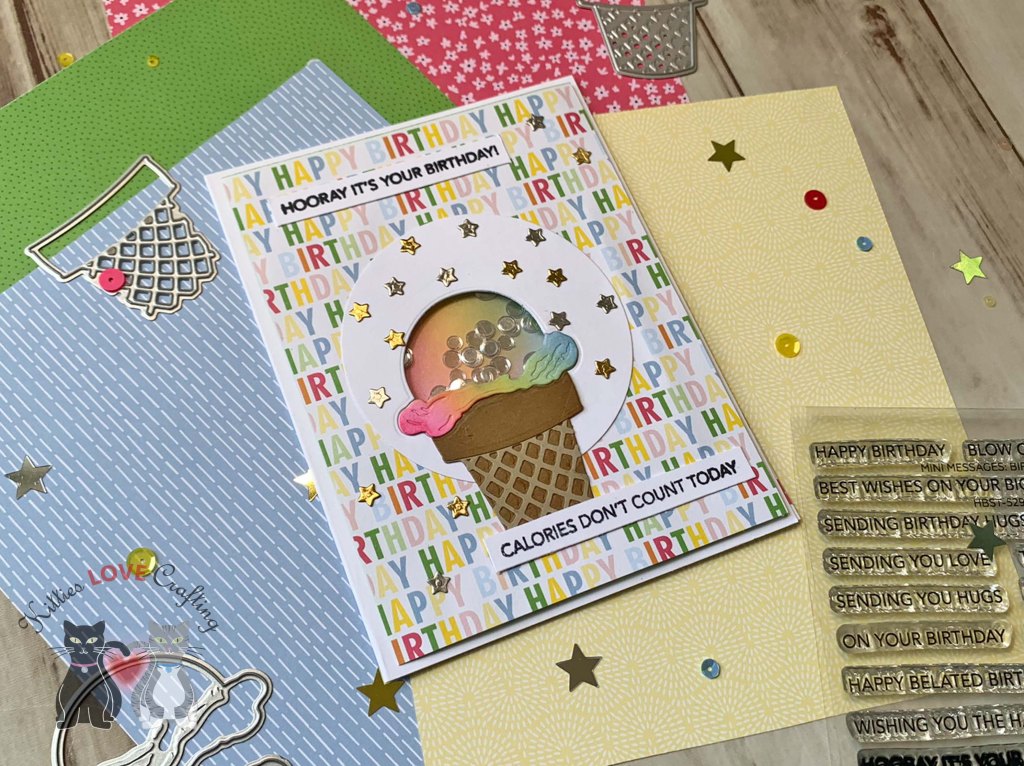
Hello friends. Here’s another quick and easy birthday card using the Lovely Layers: Cupcakes & More die set from Honeybee Stamps. For this one I created a shaker card using the ice cream dies.
Thanks for reading this post. I hope I’ve inspired you to give this cute shaker birthday card a try and use some of your older supplies. Leave comments or questions below or feel free to email.
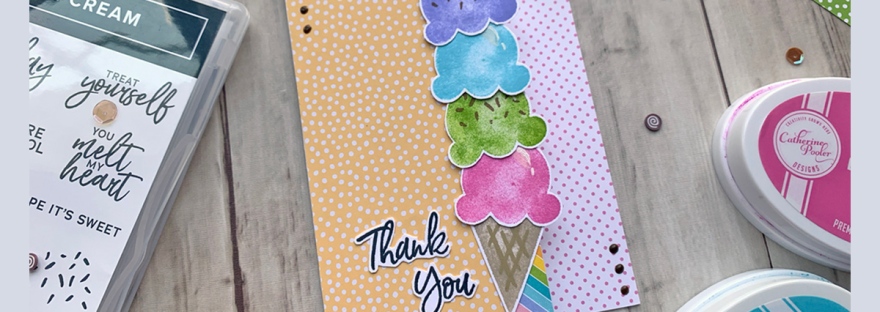
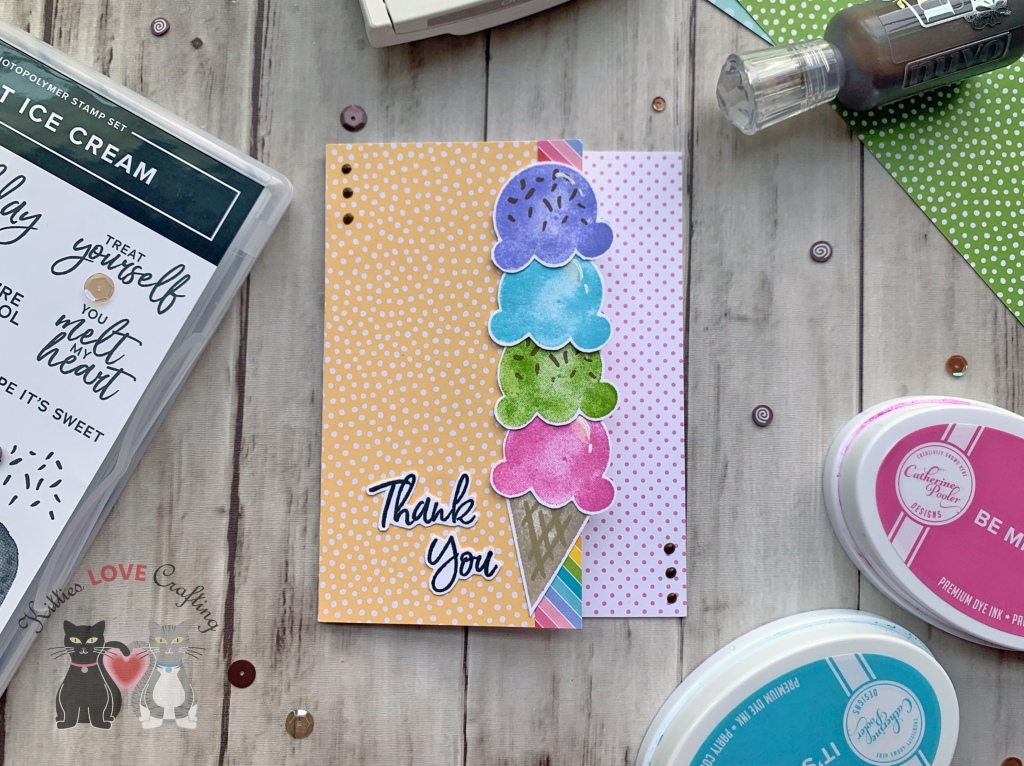
Hi everyone! I was playing with the Stampin’ Up!’s Sweet Ice Cream Stampset and tried to think of a card I can make using minimal supplies and taking advantage of all the paper in my stash! Here’s what I came up with.
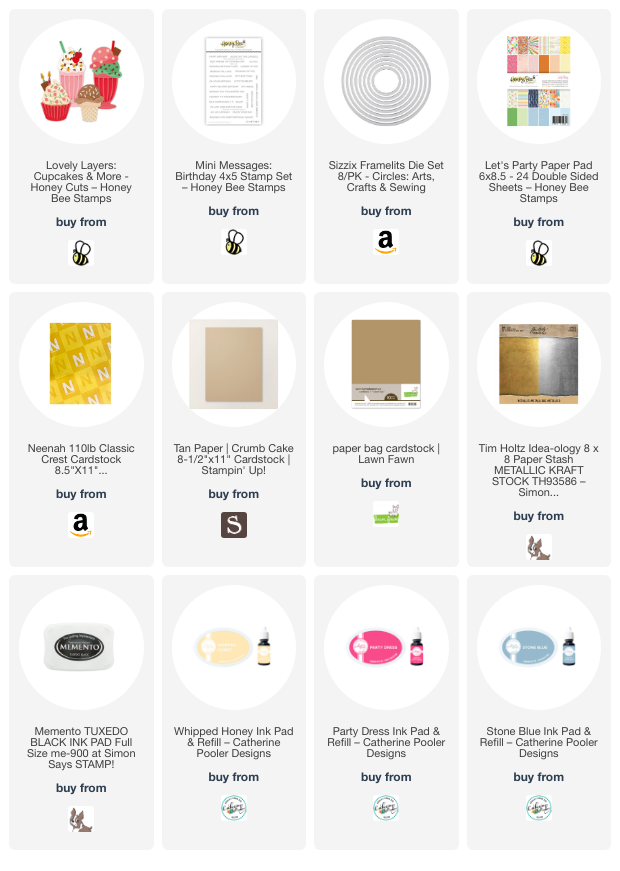
I used Neenah 110lb Classic Crest Cardstock 8.5 X 11″ cut to 5-1/2 x 8-1/2″ and scored at 4-1/4″ to make the card base and cut off 1-1/2″ from the front right side of the card base. I also cut a piece of Stampin’ Up! 6 x 6 Subtles (retired) polka dot paper in So Saffron to 3 x 5-1/2″ and a piece of Lawn Fawn Really Rainbow 6 x 6 Petite Paper Pack to 1/2 x 5-1/2″ which I adhered to the front of the card and a piece of pink polka dot paper from the Doodlebug Designs 12 x 12 Milk and Cookies Petite Print Assortment (not sure if it’s available anymore) for the inside, which I cut to 1-3/8 x 5-1/2″.
Thanks for reading this post. I hope you enjoyed and I’ve inspired you to try this cute summer fun fold card using this stampset and paper from your stash! Leave comments or questions below or feel free to email me. If you want to share you creations with me tag me on instagram @kittieslovecrafting.
Hi friends! Love the look of watercolor but not so great at it like me?!? This Sweet Ice Cream Stampset from Stampin’ Up! is a great option. You can make quick cards with little effort but they look like you spent lots of time watercoloring the images. 🙂 And they look so cute when complete!
Thanks for reading this post. I hope you enjoyed and I’ve inspired you to try this cute summer slimline ice cream card using this stampset for yourself! Leave comments or questions below or feel free to email me. If you want to share you creations with me tag me on instagram @kittieslovecrafting.
Hello friends. To celebrate the new Lawn Fawn’s Reveal Wheel add-on products, I made this little interactive birthday card. I love the Reveal Wheel dies. They are awesome! They make it super easy to make cute and fun cards and Lawn Fawn keeps making new dies and stampsets to go along with it.
Ok let’s get to the card making! After all that’s why you are all here. I began by cutting out all the Reveal Wheel pieces (including the ice cream cone frame with the LF Reveal Wheel Sweetest Flavor Add-on) out of Neenah Solar White 110lb Cardstock. It’s a good idea to use heavy cardstock; it gives the wheel more stability. The last thing you want is the wheel to bend while the recipient is playing with their card. Ugh! You need to cut out two panels (one with the cutout window and one without – this will be your back piece).
TIP: Make sure to use a water- based ink if using alcohol markers and an archival ink for water-based mediums such as pencils (if using gamsol), water-based markers or watercolors.
I let the ink dry and colored the images as well as colored the ice cream cone frame. Then diecut the stamped images using the coordinating dies. I also fussy cut the cone off of one of the ice cream cones and the ice cream cone frame. While those dried, I stamped the sentiment onto Stampin’ Up! Vellum and cut itdown to 11/16 x 3 3/4”.
Time to work on the Wheel itself. I colored the Wheel the same color as the middle ice cream scoop using my Prismacolor pencils and Gamsol. I stamped the faces from both Lawn Fawn Sweetest Flavor andLawn Fawn Sweet Friends around the wheel. Ok. All that’s left to do is assemble this little card. Attached the little Wheel to the larger one with a tiny brad, added 3 Stampin’ Dimensionals behind the tiny wheel and it to the back card panel. Added the black one, behind that and glued it all to the card base. Next I added the ice cream, sentiment strip and little tiny arrow to the card. Embellished with some Nuvodrops in a few different colors and it’s all done. And always make sure your card is fully functional by playing with it. LOL.
Hope you’ve enjoyed this process post and I hope I’ve inspired you to create some cards of your own. Thanks for stopping by and once again please leave questions in the comments or feel free to email me if you prefer.


 https://linkdeli.com/widget.js?id=f5e8378456858c916708