Hi everyone! Need an easy masculine card or for someone who loves a good old fashioned adult beverage??? Well have I got some cards for you! This post features one pretty quick and simple card. More cards to come… stay tuned.

For this card, I started by cutting a piece of Neenah 110lb Classic Crest Cardstock 8.5 X 11″ to 5-1/2 x 8-1/2” and scored at 4-1/2″ to make a card base and diecut a 3-3/4″circle from Balmy Blue 8-1/2″ X 11″ Cardstock using the Sizzix Framelits Die Set 8/PK – Circles. Then embossed it with the Stampin’ Up! Pinewood Planks Embossing Folder (discontinued). Any woodgrain embossing folder will do here.
I distressed it with Stampin’ Up! Balmy Blue and Soft Suede Inks and adhered it to the card base. Next I stamped the decanter, two glasses and one rind images from the Stampin’ Up! Whiskey Business Cling Stamp Set with Versamark Ink and added Ranger Gold Embossing Powder.
I used Copic Markers to color the images. Be very careful with the tips of your markers as embossing powder will get stuck to it. You have to keep rubbing it off as you color so as not to ruin your nibs. I used B0000 + 0 for the glasses and decanter, YR21, YR23 and YR27 for the liquid.

I fussycut the images and adhered them to the card, adding Stampin’ Dimensionals to the one glass. Next, I stamped the sentiment onto Neenah 110lb Classic Crest Cardstock 8.5 X 11″ from the Stampin’ Up! Whiskey Business Cling Stamp Set with Soft Suede Ink and cut it to 1 x 2-7/8” and adhered it using Stampin’ Dimensionals.
I finished it off by adding Ranger Glossy Accents to the decanter and glasses and some Nuvo Drops in Metallic Bright Gold.
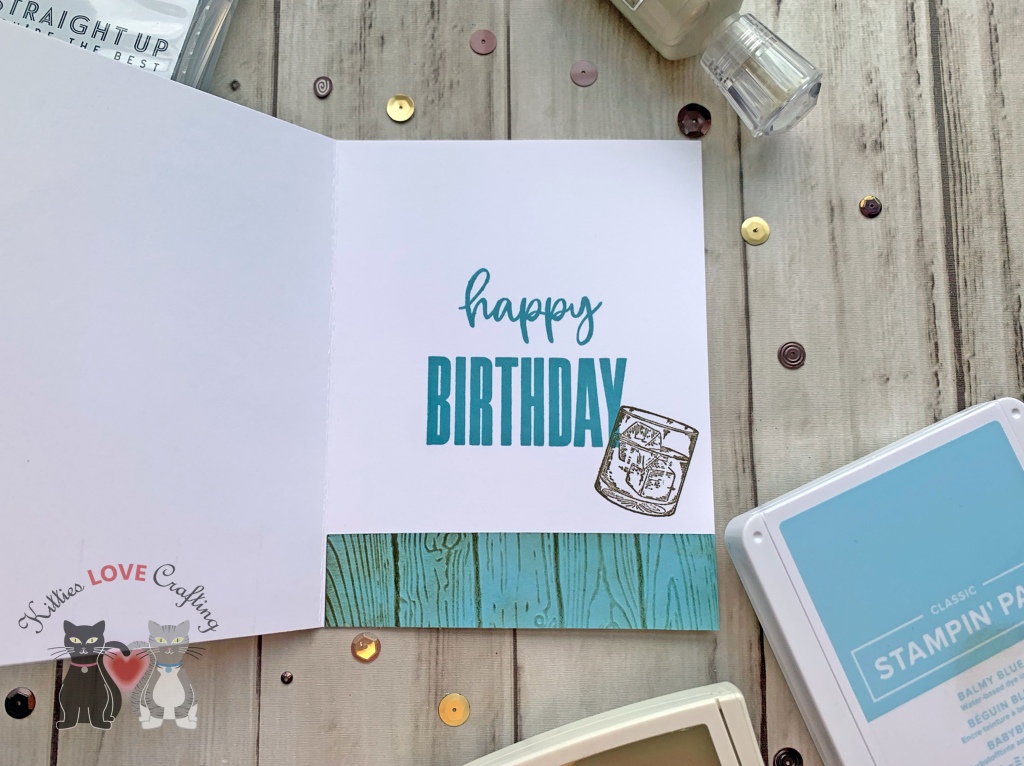
On the inside of the card, I stamped a sentiment from Biggest Wish Photopolymer Stamp Set with Stampin’ Up! Balmy Blue Ink and added a strip of Balmy Blue 8-1/2″ X 11″ Cardstock, measuring 1 x 5-1/4” which I embossed with the Stampin’ Up! Pinewood Planks Embossing Folder (discontinued) and distressed with Balmy Blue and Soft Suede Inks.
Dimensions
- Card Base = 5-1/2 x 8-1/2” and scored at 4-1/2″ Neenah 110lb Classic Crest Cardstock 8.5 X 11″
- Circle Panel = 3-3/4″ Balmy Blue 8-1/2″ X 11″ Cardstock
- Sentiment Strip = 1 x 2-7/8” Neenah 110lb Classic Crest Cardstock 8.5 X 11″
- Inside strip = 1 x 5-1/4” Balmy Blue 8-1/2″ X 11″ Cardstock
Supplies
 https://linkdeli.com/widget.js?id=f5e8378456858c916708
Thanks for reading this post. I hope you enjoyed and I’ve inspired you to try these easy masculine card using this stampset and paper for yourself! Leave comments or questions below or feel free to email me. If you want to share you creations with me tag me on instagram @kittieslovecrafting.