Hello friends. I would like to talk to you all about pattern paper and cardstock today. Most of us have a ton of it, some of us use it and some of us hoard it (Guilty as charged. LOL) Sometimes we have pattern papers that have images on them but no coordinating stamps (either you didn’t purchase them or the manufacturer didn’t create a coordinating stampset). These two paper packs from Brutus Monroe were part of their June release. Very fruity and summery but there is no coordinating stamps. I have several fruity stamp sets that will work with this paper but I know that many other people may not.
So I decided to challenge myself to make cards with just the paper and some sentiments from my stash. Since it’s still summer I decided to use fruity paper. Fruit is a delicious summer treat!
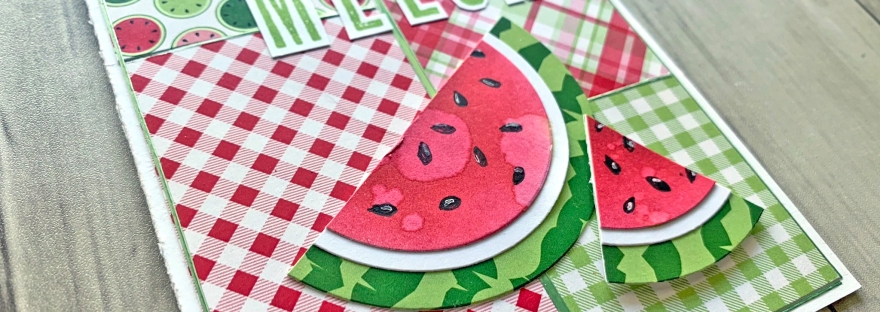
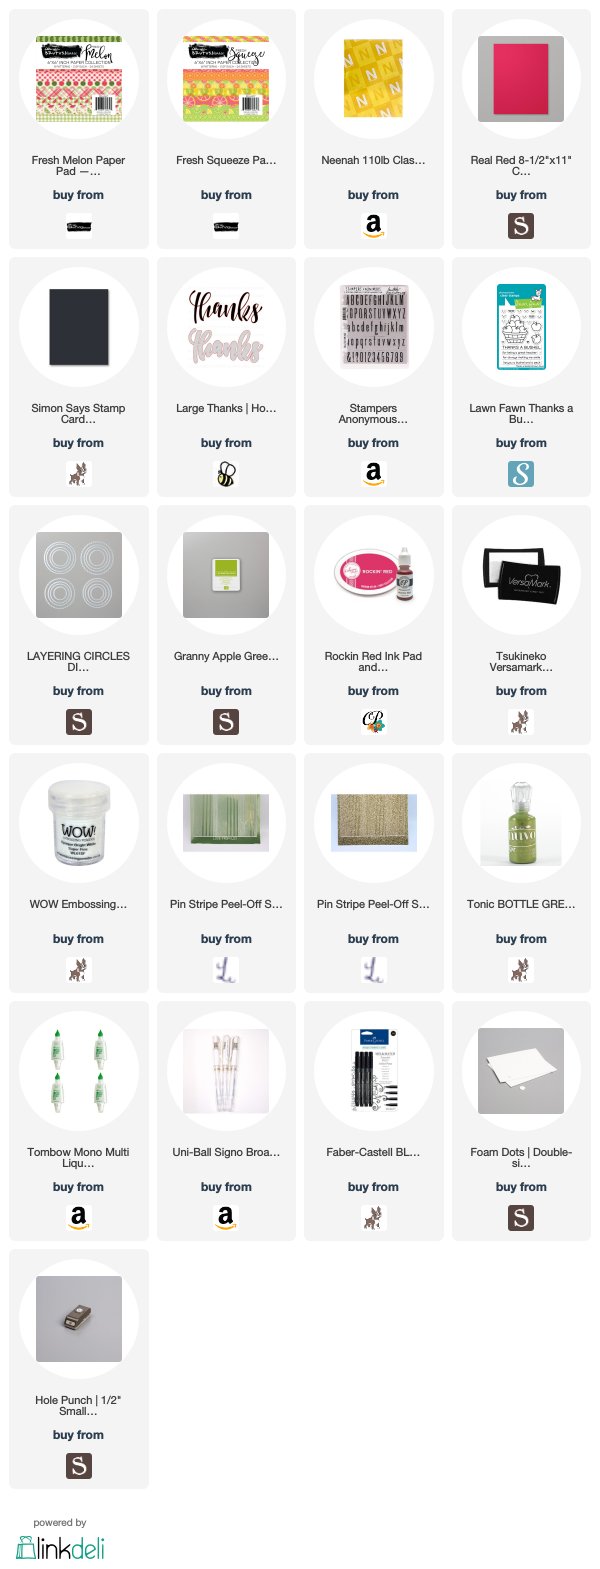
The first card I made was using the Brutus Monroe Fresh Melon Paper Pad. I grabbed my LAYERING CIRCLES DIES by Stampin’ Up! and cut out a 3″ circle from the green melon stripe pattern. Next I cut a 2 1/4″ and a 2″ circle from Neenah 110lb Classic Crest Cardstock 8.5″X11″. I took the 2″ one and inked it with Rockin Red Ink by Catherine Pooler, inking from the center out so the outer edges are lighter. I sprayed some water on it and patted it dry to remove it.

I let that dry for a few minutes and then adhered all the circles together layering from the smallest to largest. I cut that piece in half and cut slices out of the other half. I drew some seeds on each piece with my Faber-Castell BLACK ESSENTIAL PITT Artist Pens and some highlights with my Uni-Ball Signo Broad Point Gel Pen – White.
Ok, time to work on the background. I chose 4 pattern papers from the pack, cut one to 1/2 x 2-1/4″, one to 2 x 3-1/4″, one to 2 x 3-7/16″ and the last one to 2 x 2″. I adhered them on the white card base as per the below sketch. If you want a gap between your rectangles cut them down to 1/16th smaller on each side. I added a strip of the thicker width Pin Stripe Peel-Off Stickers – Apple Green by Love From Lizi vertically in the center, then the narrowest width strips to the outer edges and in between the panels horizontally.

I masked off the “BUSHEL” part of the THANKS A BUSHEL from Lawn Fawn Thanks a Bushel Stamps and stamped “Thanks A” with Tsukineko Versamark EMBOSS INK PAD Watermark and heat embossed with WOW Embossing Powder OPAQUE BRIGHT WHITE SUPER FINE onto a piece of Stampin’ Up! Real Red Cardstock. I then cut that down to a strip measuring 1/2 x 2-1/4. I also stamped the word “MELON” using Granny Apple Green Stampin’ Pad by Stampin’ Up! and the Stampers Anonymous Tim Holtz Cling Rubber Stamp Set onto Neenah 110lb Classic Crest Cardstock. I fussycut those out leaving a white border around each letter.

I laid out my sentiments and watermelon pieces onto my card to figure out placement. Once I was happy with it, I adhered all the pieces down, popping up one watermelon slice with Stampin’ Dimensionals by Stampin’ Up! . To finish this card, i added some Tonic Nuvo Drops in BOTTLE GREEN.
I had so much fun playing with these papers from Brutus Monroe that I decided to make another card.
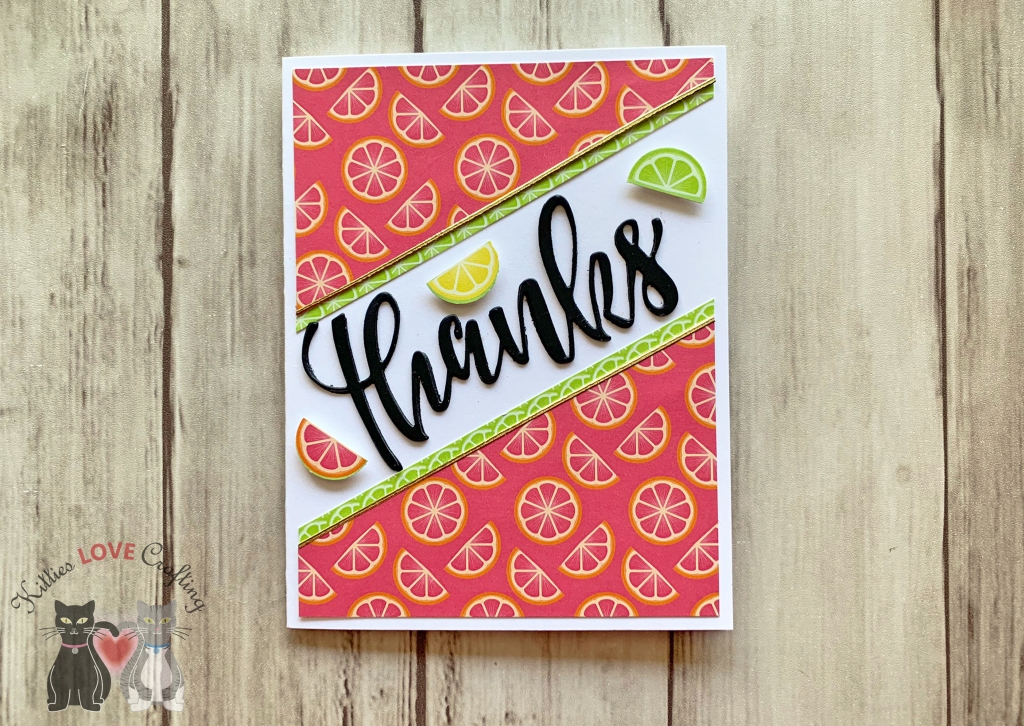
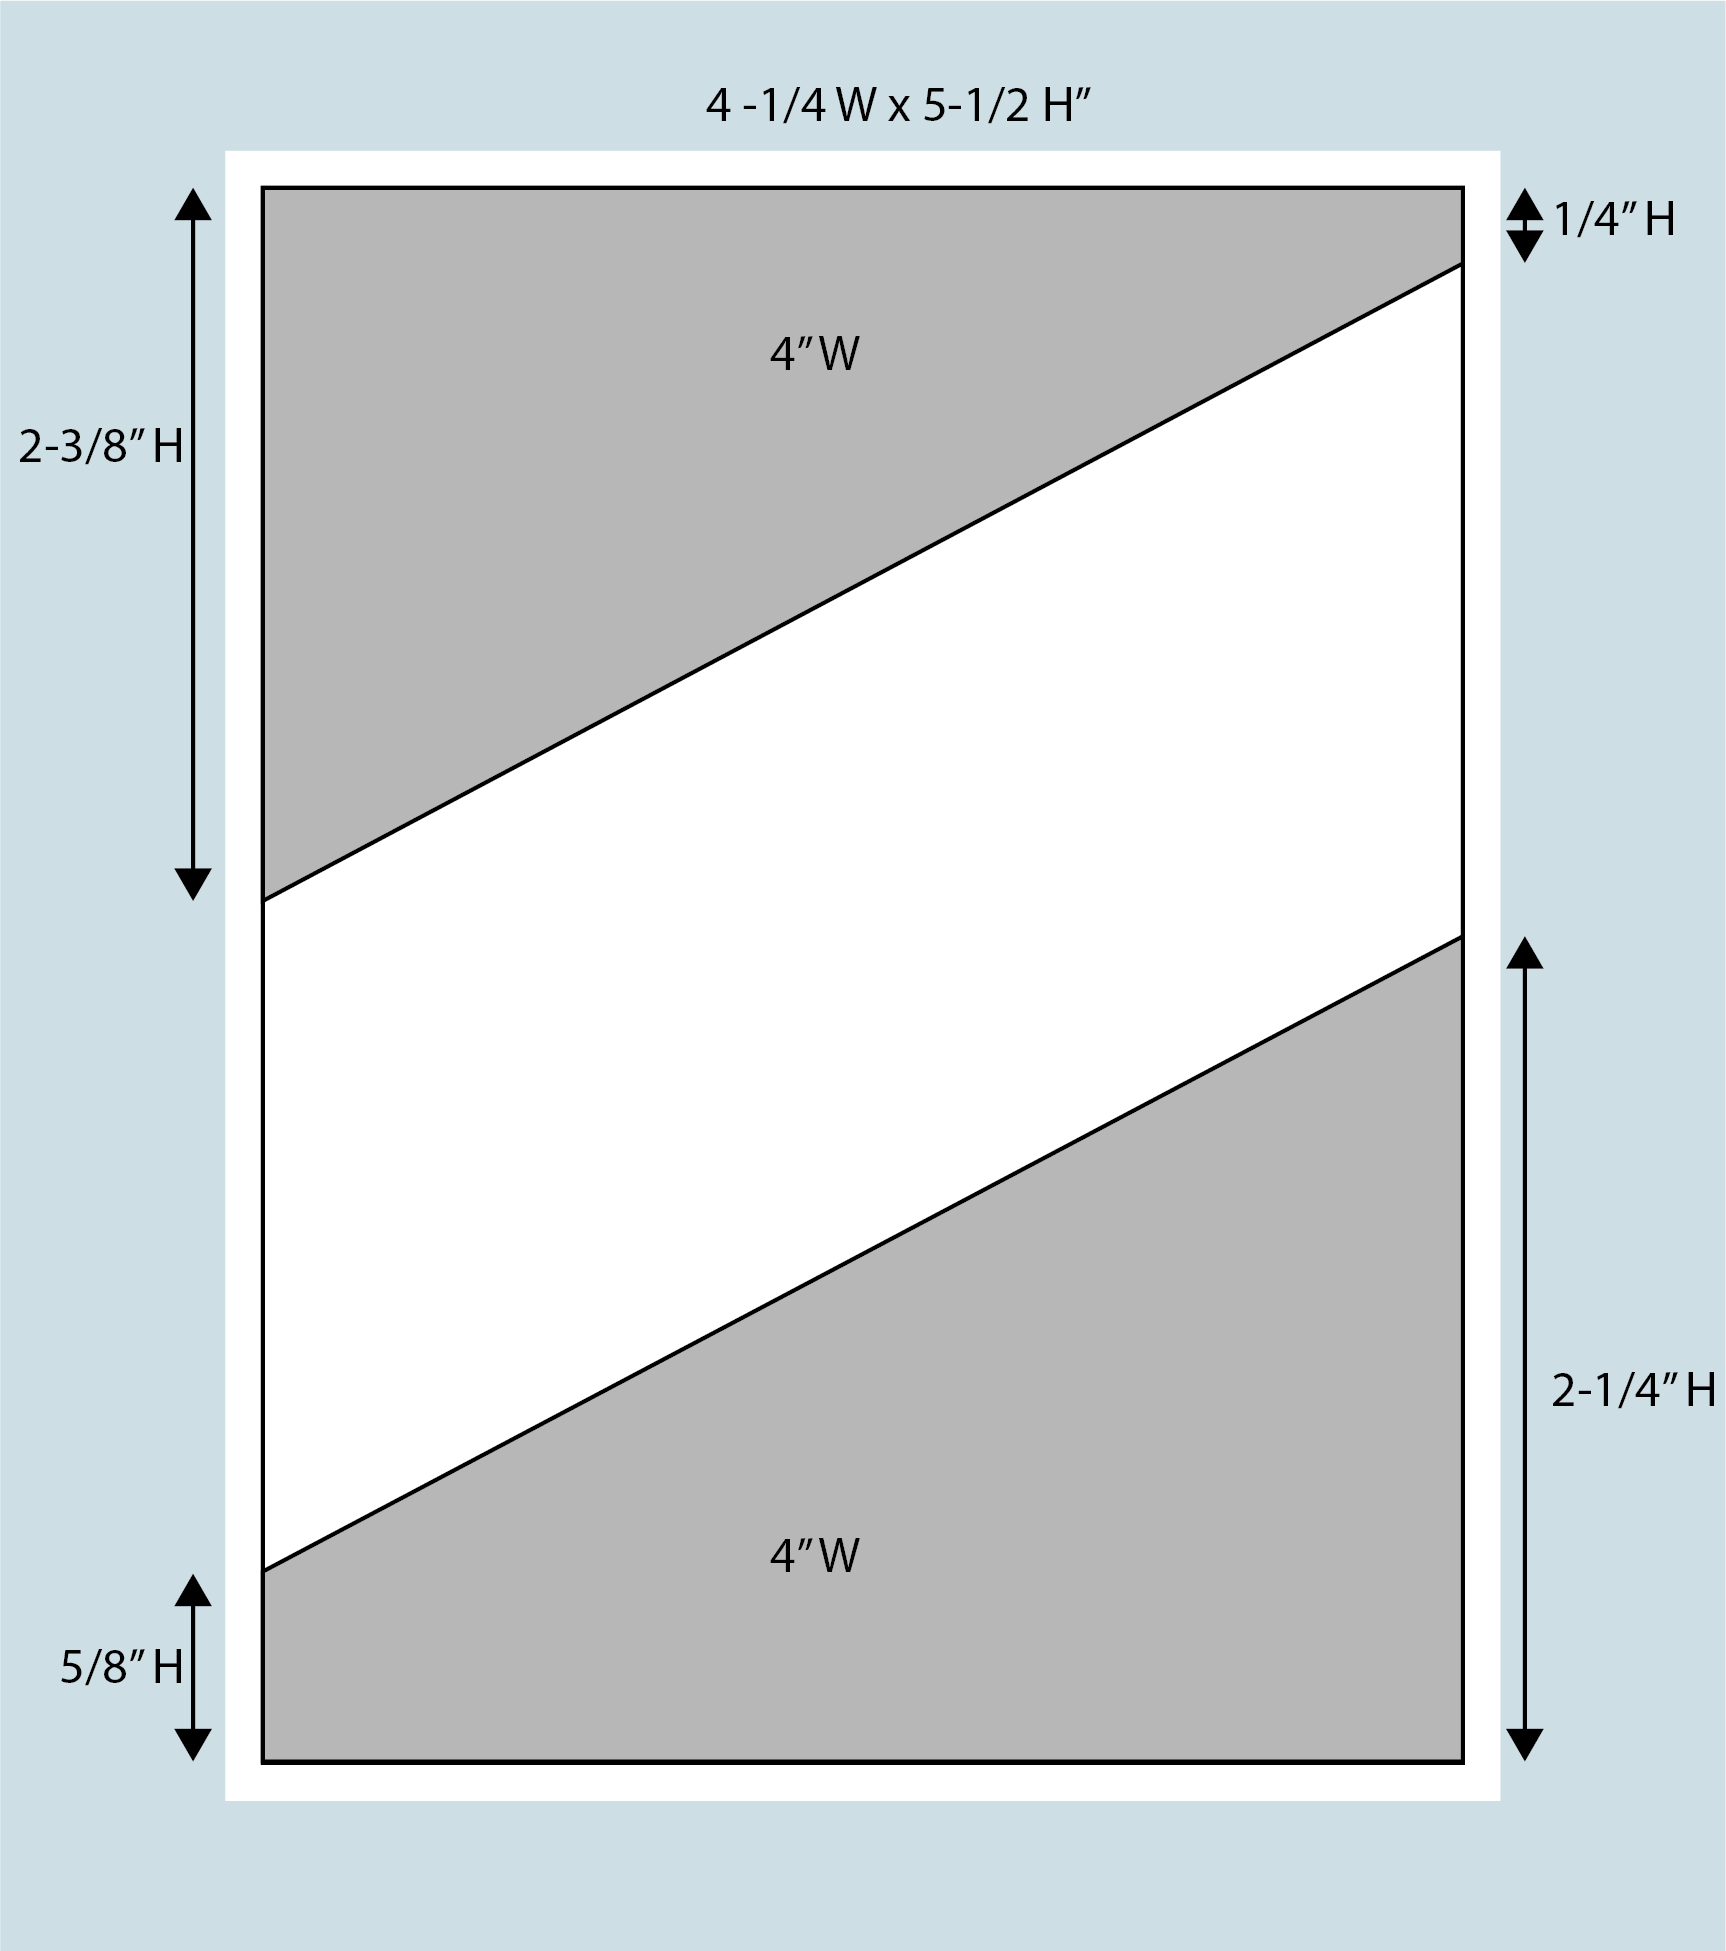
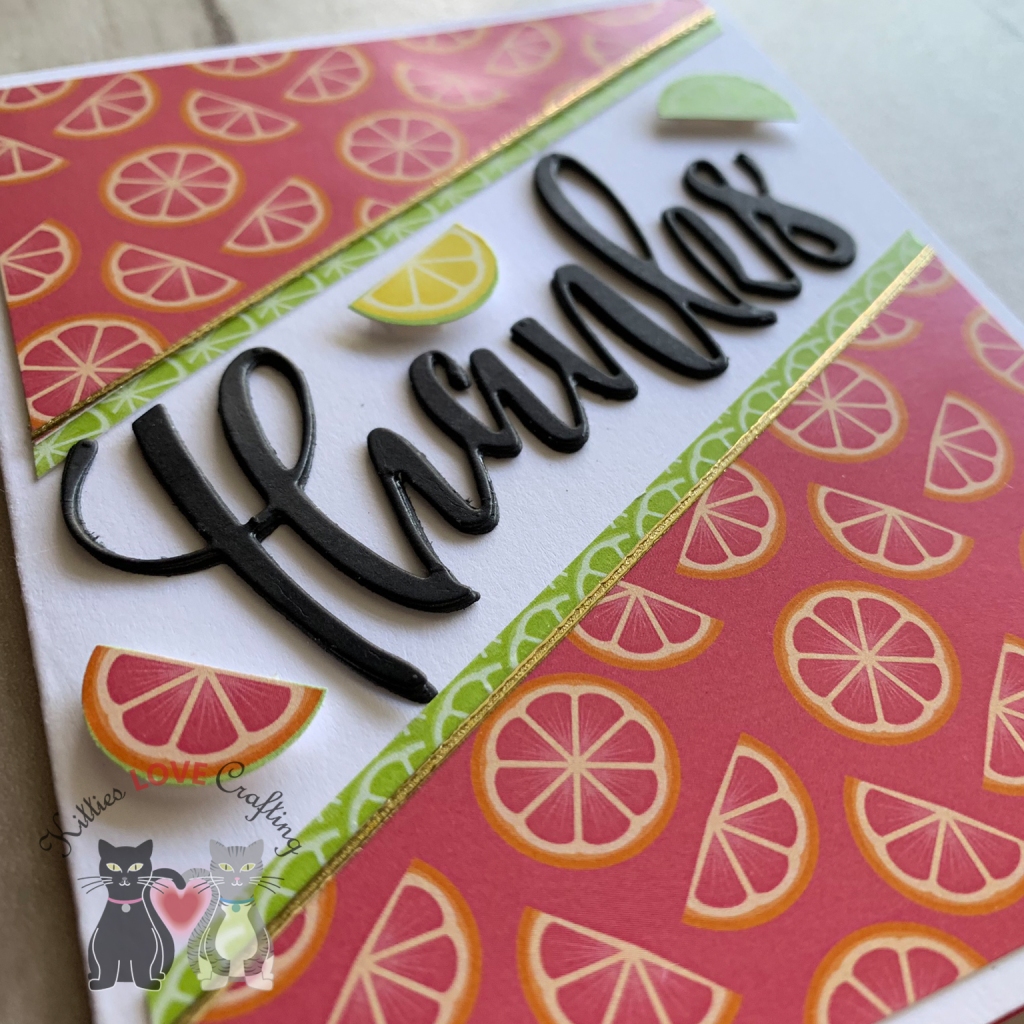
The second card came together quickly. I started with a white card base measuring 5-1/2 x 8-1/2″, scoring it at 4 1/2″. This was made from Neenah 110lb Classic Crest Cardstock 8.5″X11″. Next, I cut some of the pattern paper down to 4 x 5-1/4″ and cut that down diagonally as per the below sketch. I did the same thing to a second pattern paper (green one) and adhered that behind the top layer, offsetting it a bit to create a border. I added a strip of the thinner width Love From Lizi Pin Stripe Peel-Off Stickers in Gold Glitter between the two pattern papers and adhered them to my card base, leaving a 1/8 border around the edge.
For the sentiment, I kept thing simple. I used the Large Thanks Die from Honey Bee Stamps and diecut the word 3 times from Simon Says Stamp Card Stock 100# BLACK Cardstock. I layered those 3 together and adhered them, creating a nice thick 3D sentiment. I adhered those to the card in the center of the white space. I felt like something was missing though. I took another pattern paper that had small lemons, limes and oranges (maybe grapefruit? not sure) and using a 1/2 punch I cut 3 of them out and adhered them on my page. That completed the front of this card! Like I said, this one was a quick one.
But just because I hate an empty card inside, I adhered some of the same pattern paper I used on the front diagonally to the inside bottom right corner. And now its complete!

 https://linkdeli.com/widget.js?1559654439292
Thanks for stopping by and I hope I’ve inspired you to start making your thank you cards. Leave comments or questions below or feel free to email me.
